Saturday, June 10, 2023

IBM MQ 9.3.0 Installation in Windows

In order to download the IMB MQ 9.3.0 go to following link and download the developer version. Once it successfully downloaded extract the zip file in to desired folder in your computer. After extraction you can see two folders extracted MQServer and META-INF. 

Installing IBM MQ 

Navigate to MQServer folder and run Setup.exe file as administrator. Once you double click you will be able to see similar Interface to below figure. On that navigate to IBM MQ Installation tab and click on Launch IBM MQ Installer.


During installation, you need to agree the conditions and continue your installation. After successful installation you should be able to see following Interface.


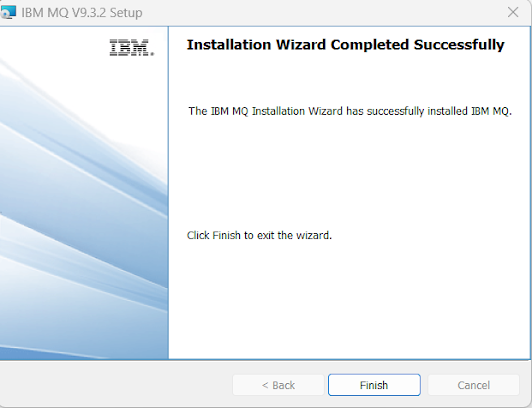
After click on the Finish it will prompt to next Installation  "Prepare IBM MQ Wizard" on that also you can click next and continue installation. In Network configuration you can select default selected No option for domain controller. Then click next and it will finish the installation. Click Finish on the final Interface and then restart your computer.


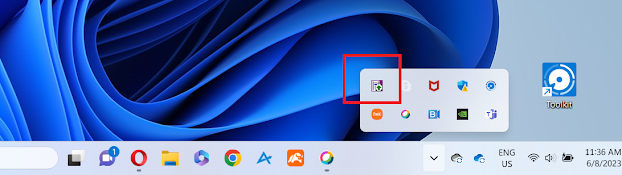
After restart you should be able to see the IBM MQ Server instance in your Windows Bar as show in below figure


Also if you go to the services you can see the IBM MQ running as service.


Creating IBM MQ Users

First go to the services and Stop "IMN MQ" service.

Then go to following location "C:\ProgramData\IBM\MQ\web\installations\Installation1\servers\mqweb" and open the  mqwebuser.xml file.

Add following highlighted area in to the file. 
In this section, first I have added admin as a user in to the system with password. Then I have added Web console and MQ messaging user as admin,

<?xml version="1.0" encoding="UTF-8"?>
<server>
    <featureManager>
        <feature>appSecurity-2.0</feature>
    </featureManager>
    <sslDefault sslRef="mqDefaultSSLConfig"/>
    <enterpriseApplication id="com.ibm.mq.console">
        <application-bnd>
            <security-role name="MQWebAdmin">
                <group name="MQWebUI" realm="defaultRealm"/>
            </security-role>
        </application-bnd>
    </enterpriseApplication>
    <enterpriseApplication id="com.ibm.mq.rest">
        <application-bnd>
            <security-role name="MQWebAdmin">
                <group name="MQWebUI" realm="defaultRealm"/>
            </security-role>
            <security-role name="MQWebUser">
                <group name="MQWebMessaging" realm="defaultRealm"/>
            </security-role>
        </application-bnd>
    </enterpriseApplication>          
    
    <basicRegistry id="basic" realm="defaultRealm">
<user name="admin" password="123321"/>
<group name="MQWebUI">
<member name="admin"/>
</group>
<group name="MQWebMessaging">
<member name="admin"/>
</group>
    </basicRegistry>
</server> 

Now restart the IBM MQ service in Services then open Command Prompt and navigate to C:\Program Files\IBM\MQ\bin location then type strmqweb.bat then press enter to Start IMB MQ Web console.


 Then you should be able to access the IBM MQ Web console https://localhost:9443/ibmmq/console/login.html


Then enter the user name and password configured in the mqwebuser.xml file and you should be able to log in to IBM Web console.

After successful login you should be able to see similar figure as below.


We successfully installed the IBM MQ in windows.

Sunday, April 12, 2020

Hibernate Date, TimeStamp and Time

In this post I'll demonstrate different between Hibernate Date, Time and TimeStamp with Microsoft SQL Server database. For this demonstration I will use code base of "Spring Boot REST API with SQLServer 2019" post. Git code base for the initialization of the project can find in GIT CODE base.

Prerequisites 
  1. You should have install java 1.8 or above.
  2. You should have Eclipse installed in your PC.
  3. Your PC should setup Maven installed and configured.
  4. MS SQL server need to be installed. 


Modify Model class 

For this demonstration I will add three parameters to out model class "Book". Those three parameters will map to respective columns in "BOOKS" table which store TIMESTAMP, DATE and TIME.

@Temporal(TemporalType.TIMESTAMP)
private Date timeStamp;
@Temporal(TemporalType.DATE)
private Date date;
@Temporal(TemporalType.TIME)
private Date time;

I have added above three parameters and relevant geter/setter methods.We can define the preferred mapping with the @Temporal annotation. As you can see in above code, it takes a TemporalType enum as a value. The enum allows you to select the SQL type (DATE, TIME or TIMESTAMP) which you want to use.

Modify Service class 

Then lets update the service method of setDateTime which set values for book objects time, date and time stamp. 

private void setDateTime(Book book){
   Date date= Calendar.getInstance().getTime();
   book.setTimeStamp(date);
   book.setDate(date);
   book.setTime(date);
}

Then call this setDateTime method from saving method of Book saveBookInJSON method. 


Run the application

In order to run first we have to perform maven install command and then we can run the application


Go to run debug configuration and add following command 

spring-boot:run


Then run the application  by click on Run button


After successful execution you should be able to see similar output as show below.


Lets Test the application 


Then lets add new Book in to API


curl -H "Accept: application/json" -H "Content-type: application/json" -X POST -d "{ \"isbmNumber\":\"9999\", \"name\":\"How to develop API\", \"description\":\"sample book\", \"auther\":\"Nirmal Balasooriya \" }" http://localhost:8080/saveOrUpdate

  
For this one following output will return


{"code":"1","desc":"Book save successful","t":"9999"}

If you check the database then you could see the saved data in the database as show in below.

Saved details in the Database.

As you can see in the database Date, Time and TimeStamp values can be see as show below.

time          :  17:45:28.6600000
date          2020-04-12
timestamp :  2020-04-12 17:45:28.6590000

You can be find updated code base in following GIT HUB location.

Monday, April 6, 2020

Upload Large Files in JBoss EAP - Resolve UT000020: Connection terminated as request was larger than 10485760

In this post I will demonstrate how to resolve "UT000020: Connection terminated as request was larger than 10485760". This error because of the file that we going to upload exceeds maximum size allowed in default configuration (10MB) on JBoss EAP. For demonstration purposes I will use JackRabbit post code.

For the testing purposes I have added new Image (LARGE.JPG) in to resource folder and if you try to execute following command in browser you will hit an error.

http://localhost:9090/uploadResource/large

2020-04-06 19:41:40.693 ERROR 21016 --- [nio-9090-exec-1] o.s.boot.web.support.ErrorPageFilter     : Forwarding to error page from request [/uploadResource/large] due to exception [org.apache.http.NoHttpResponseException: localhost:8080 failed to respond]

javax.jcr.RepositoryException: org.apache.http.NoHttpResponseException: localhost:8080 failed to respond
at org.apache.jackrabbit.spi2davex.RepositoryServiceImpl$BatchImpl.start(RepositoryServiceImpl.java:634) ~[jackrabbit-spi2dav-2.19.3.jar:2.19.3]
at org.apache.jackrabbit.spi2davex.RepositoryServiceImpl$BatchImpl.access$600(RepositoryServiceImpl.java:569) ~[jackrabbit-spi2dav-2.19.3.jar:2.19.3]


Exception in the Spring-Boot application


Also if you check in JBoss log you should be see following exception.

19:41:40,712 ERROR [org.apache.jackrabbit.server.util.HttpMultipartPost] (default task-15) Error while processing multipart.: org.apache.commons.fileupload.FileUploadBase$IOFileUploadException: Processing of multipart/form-data request failed. UT000020: Connection terminated as request was larger than 10485760
        at org.apache.commons.fileupload.FileUploadBase.parseRequest(FileUploadBase.java:351)
        at org.apache.commons.fileupload.servlet.ServletFileUpload.parseRequest(ServletFileUpload.java:115)
        at org.apache.jackrabbit.server.util.HttpMultipartPost.extractMultipart(HttpMultipartPost.java:76)
        at org.apache.jackrabbit.server.util.HttpMultipartPost.<init>(HttpMultipartPost.java:51)
        at org.apache.jackrabbit.server.util.RequestData.<init>(RequestData.java:36)
        at org.apache.jackrabbit.server.remoting.davex.JcrRemotingServlet.doPost(JcrRemotingServlet.java:416)
        at org.apache.jackrabbit.webdav.server.AbstractWebdavServlet.execute(AbstractWebdavServlet.java:372)
        at org.apache.jackrabbit.webdav.server.AbstractWebdavServlet.service(AbstractWebdavServlet.java:308)
        at javax.servlet.http.HttpServlet.service(HttpServlet.java:790)
        at io.undertow.servlet.handlers.ServletHandler.handleRequest(ServletHandler.java:85)
        at 


Exception in JBoss EAP

The main reason for this exception is we are trying to upload a file which size is larger than the default allowed size in JBoss.

Lets see how we can configure to allow JBoss to configure it for 100MB file.
First You have to log in to JBoss EAP admin console(http://127.0.0.1:9990/console/App.html#home) using username and password.

Then navigate to Configuration page and then click on "SubSystems" in left panel then click on "Web/HTTP - Undertow". Then Click on  view button on "HTTP". Please refer to below image.


Then you should able to view similar page to below figure. Then click on "HTTP SERVER" Tab and click on View button as show in below figure.


Then click on "HTTP Listener" in right side panel and then click on Edit button as show in below figure.


Then find the parameter name "Max post size" and set value as "104857600" (this is in byte value) which equal to 100 MB. Then Click save button and re-lode the server.

After that change if you try to upload large file by following URL it will get sucess.

http://localhost:9090/uploadResource/large

You could see following output on web browser.

{"code":"1","desc":"Resource Added Successfully","t":null}


also if you try to access that image using following URL you should be able to see uploaded image.


Code base for this can be found in following GITHUB location

Friday, April 3, 2020

Non-blocking I/O(NIO) File handling operations

In this post I will list down some of common file operations which encounter in day today basis when working. Following are required to run the provided project shared at end of the post.

Prerequisites 
  1. You should have install java 1.8 or above.
  2. You should have Eclipse installed in your PC.
  3. Your PC should setup Maven installed and configured.


Create Files

For this one also we can use Files.createFile method in java.nio.file.Files class. For this method we need to provide Path object of new file.  Note that this method will throw java.nio.file.FileAlreadyExistsException when file already existing. As you can see sample code in createFile() method.


String parentFolderPath="C:\\JAVA8_FILE_HANDLING\\src\\main\\resources\\PARENT_FOLDER\\";

File newFile= new File(parentFolderPath+"Test.txt");

if(!newFile.exists())
    Files.createFile(newFile.toPath());

System.out.println("Newly created file exists :: "+newFile.exists());


List everything in a folder
For listing of folder we can useFiles.list method in java.nio.file.Files class. For that method we can pass the folder path which we need to list down. Note that this list method will throw IOException so we have to handle it in our code. You can see sample code in listDownAllFilesAndFolder() method.

String parentFolderPath=
"C:\\JAVA8_FILE_HANDLING\\src\\main\\resources\\PARENT_FOLDER\\";

List fileList = Files.list(Paths.get(parentFolderPath)).collect(Collectors.toList());

fileList.forEach(System.out::println);


Search file in a folder
For this one also we can use Files.list method in java.nio.file.Files class with Filter functionality. As you can see sample code in SearchFilesInFolder() method.

String parentFolderPath=
"C:\\JAVA8_FILE_HANDLING\\src\\main\\resources\\PARENT_FOLDER\\";

String fileToSearch="srilanka";


List fileList = Files.list(Paths.get(parentFolderPath))
        .filter(path -> new File(path.toString()).getName().startsWith(fileToSearch))
        .collect(Collectors.toList());

fileList.forEach(System.out::println);


Read Property File Line by Line

For this one also we can use Files.lines method in java.nio.file.Files class and with help of Stream we can put all lines in to List as show in below example. As you can see sample code in readPropertyFileLineByLine() method.


String fileName = 
"C:\\JAVA8_FILE_HANDLING\\src\\main\\resources\\PARENT_FOLDER\\SampleProperty-2020-04-04.properties";


List<String> list = new ArrayList<>();
try (Stream<String> stream = Files.lines(Paths.get(fileName))) {
    
    list = stream
            .collect(Collectors.toList());} 
catch (IOException e) {
    e.printStackTrace();
}

list.forEach(System.out::println);


Moving Files and Folders

For this one also we can use Files.move method in java.nio.file.Files class and for this method we need to provide source path and destination path. For this method we can pass optional parameter which we can say to program whether we need to override existing files in destination folder. One most important thing in this method is it will remove all the items inside source folder and source folder it self as well. As you can see sample code in moveFilesAndFolders() method. 


String parentFolderPath="C:\\JAVA8_FILE_HANDLING\\src\\main\\resources\\PARENT_FOLDER\\";

String destFolderPath="C:\\JAVA8_FILE_HANDLING\\src\\main\\resources\\OUTPUT\\";

Files.move(Paths.get(parentFolderPath),Paths.get(destFolderPath)
, StandardCopyOption.REPLACE_EXISTING);

List fileList = Files.list(Paths.get(destFolderPath)).collect(Collectors.toList());

fileList.forEach(System.out::println);


Friday, March 20, 2020

Enable SSL in JBoss EAP 7.1

In this post I will demonstrate how to enable SSL in JBoss EAP 7.1 and I will use "" post for the demonstration purposes.

Prerequisites 
  1. You should have install java 1.8 or above.
  2. You should have Eclipse installed in your PC.
  3. Your PC should setup Maven installed and configured.
  4. MS SQL server need to be installed. 
  5.  You need to have JBoss EAP instance in your PC.


Lets deploy the application 

First check out the project from GitHub repository related my my previous post "spring-boot-rest-api-with-sqlserver-2019"
First lets enable Database user name and password on application properties by removing "#" marks in-front of spring.datasource.username and spring.datasource.password.  

#==== connect to mysql ======#
spring.jpa.hibernate.ddl-auto=update
spring.datasource.url=jdbc:sqlserver://localhost;databaseName=TestDB
spring.datasource.username=nirmal
spring.datasource.password=Test123_

spring.datasource.driverClassName=com.microsoft.sqlserver.jdbc.SQLServerDriver
spring.jpa.database-platform=org.hibernate.dialect.SQLServer2012Dialect
server.port = 8080

spring.jpa.properties.hibernate.show_sql=true
spring.jpa.properties.hibernate.use_sql_comments=false
spring.jpa.properties.hibernate.format_sql=true
#==== Logging configurations ======#
logging.level.root=WARN,INFO,ERROR
logging.level.com.baeldung=TRACE


First perform maven install and generate the war as show in figure below.


Then lets start the JBoss EAP by double click on standalon.exe in windows or running standalone.sh file in linux.  When EAP starts you can see following warning message has been display in the console. 

WARN  [org.jboss.as.domain.management.security] (MSC service thread 1-7) WFLYDM0111: Keystore G:\Programs\Servers\jboss-eap-7.1.0_1\jboss-eap-7.1\standalone\configuration\application.keystore not found, it will be auto generated on first use with a self signed certificate for host localhost

Warning related Keystore missing certificate

How ever first lets deploy the war file in to EAP and see whether its functioning. After starting the EAP go to JBoss Admin console  and navigate to Deployments tab. Then deploy your generated war file.

Now you should be able to access following URL
http://localhost:8080/RestApiSpringBoot-0.0.1-SNAPSHOT/findBook/1

And in browser you should be able to see similar output.

REST get API output


Lets generate the Key 

To generate the SSL key we are using Java "keytool". In order to generate the key open command prompt as Administrator and navigate Java installation directory. Then you can execute following command.

keytool.exe -genkey -alias server -keyalg RSA -keystore application.keystore -validity 2000


Once you enter above mentions command then first it will ask for the password I will use default password as "password". Then it will ask some basic details about your server you can provide your own details and will not have impact on these for now.

What is your first and last name?
Nirmal Balasooriya
What is the name of your organizational unit?
NimralBalasooriyaBlog
What is the name of your organization?
NirmalBalasooriyaBlog
What is the name of your City or Locality?
Singapore
What is the name of your State or Province?
Singapore
What is the two-letter country code for this unit?
SG
Is CN=Nirmal Balasooriya, OU=NimralBalasooriyaBlog, O=NirmalBalasooriyaBlog, L=Singapore, ST=Singapore, C=SG correct?
Yes

After these details it will ask you to enter password for another time for verification.

Generation of ssl key

Actually these details already configured in the standalone.xml in "<EAP_BASE_DIR>\standalone\configuration" directory. If you open the xml file and search for following "<security-realm name="ApplicationRealm">" in xml you can find these configurations as show below.


            <security-realm name="ApplicationRealm">
                <server-identities>
                    <ssl>
                        <keystore path="application.keystore" relative-to="jboss.server.config.dir" keystore-password="password" alias="server" key-password="password" generate-self-signed-certificate-host="localhost"/>
                    </ssl>
                </server-identities>
                <authentication>
                    <local default-user="$local" allowed-users="*" skip-group-loading="true"/>
                    <properties path="application-users.properties" relative-to="jboss.server.config.dir"/>
                </authentication>
                <authorization>
                    <properties path="application-roles.properties" relative-to="jboss.server.config.dir"/>
                </authorization>
            </security-realm>


So we are generated our ssl key based on this default configuration. Now you should be able to see new file "application.keystore" has been generated in Java bin folder. Then copy and past that file in to "<EAP_BASE_DIR>\standalone\configuration"


Lets test the application with SSL

After above modifications lets restart the JBoss EAP. Now you should be able to see similar out put as show in below.

Now you will not able to see previous warning that generated When EAP starts. Also you should able to see EAP is listening for HTTPS port as well.

INFO  [org.wildfly.extension.undertow] (MSC service thread 1-7) WFLYUT0006: Undertow HTTPS listener https listening on 127.0.0.1:8443


SSL is enable in EAP 7.1


Now if you try to access our web service with HTTPS following URL.

https://localhost:8443/RestApiSpringBoot-0.0.1-SNAPSHOT/findBook/1

Browser will give you warning that we are going to access "Your connection is not private" as show below.

Then click me Help me to understand and then Proceed to localhost (unsafe)


Then You should be able to see similar output as below.


Monday, March 16, 2020

Deploy static resource in war file using Maven

In this post I will demonstrate how we can deploy simple static file in a war file. This will only use maven and will not use any other framework.


Prerequisites 


  1. You should have install java 1.8 or above.
  2. You should have Eclipse/IntelliJ Idea installed in your PC.
  3. Your PC should setup Maven installed and configured.


Create the Project

In InteliJIdea go to Files - > New -> Project select default JDK installed and click next as show in below figure.


Then provide Project name and GroupID to your project. I will use following details

Name      : StaticWebResource
GroupID : com.nirmal.blog

Then click Finish.


Add relevant dependencies Project

Lets add relevant dependencies in to the project. Just modify project pom file as show below.

<?xml version="1.0" encoding="UTF-8"?>
<project xmlns="http://maven.apache.org/POM/4.0.0"
         xmlns:xsi="http://www.w3.org/2001/XMLSchema-instance"
         xsi:schemaLocation="http://maven.apache.org/POM/4.0.0 http://maven.apache.org/xsd/maven-4.0.0.xsd">
    <modelVersion>4.0.0</modelVersion>

    <groupId>com.nirmal.blog</groupId>
    <artifactId>StaticWebResource</artifactId>
    <version>1.0-SNAPSHOT</version>
    <packaging>war</packaging>
    <build>
        <plugins>
            <plugin>
                <groupId>org.apache.maven.plugins</groupId>
                <artifactId>maven-war-plugin</artifactId>
                <version>2.3</version>
                <configuration>
                    <failOnMissingWebXml>false</failOnMissingWebXml>
                </configuration>
            </plugin>
            <plugin>
                <groupId>org.springframework.boot</groupId>
                <artifactId>spring-boot-maven-plugin</artifactId>
            </plugin>
        </plugins>
        <finalName>StaticWebResource</finalName>
    </build>

</project>

Make sure to add maven-war-plugin and set the configuration "failOnMissingWebXml"  value as false.


Add static resource in to Project

For the demonstration purposes I will use "jquery.min.js". First download this file in to local PC. Then create new folder call webapp. Then put your static resources in this folder. In my demonstration I will put downloaded jquery.min.js file.


Lets Create the war file

To create the war file just perform maven install (Just double click on install under lifecycle in Maven section ) and then you can see the generated war file inside target folder.


Deploy in to JBoss server

Log in to the JBoss web admin console and navigate to deployments tab. Then click on Add button and Then click Next. Select war file and again click next and Click Finish. Application will successfully deployed in to the JBoss server.

Now you should be able to access the deployed static resource from following URL.

http://localhost:8080/StaticWebResource/jquery.min.js

Loaded static resource file. 
You can find project source on following GIT resource.