- constructor : Spring container will look in to Constructor based autowire.
- byName : Spring container will look in to bean name matching.
- byType : Spring container will look in to bean class type matching
- No (by reference) : Spring container will look in to bean reference explicitly.
- default-autowire : Spring container will look in to default-autowire type define in Beans tag on Spring configuration.
Lets create small demonstration application to get understand about each and every Autowire type.
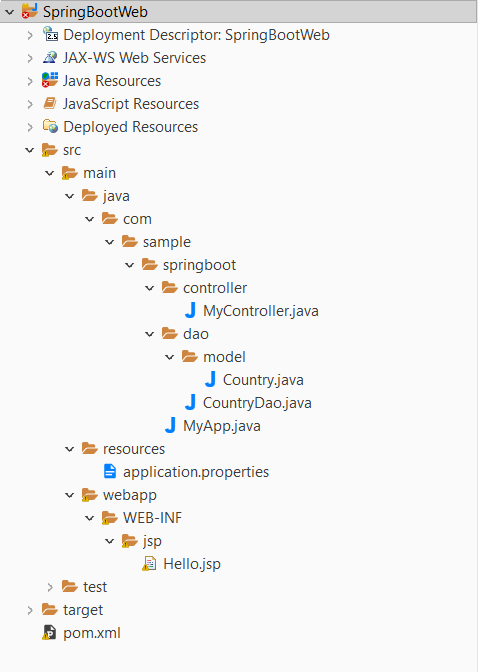
Lets create simple maven project I'll provide GrouupId as "com.sample.spring" and artifactID as "SpringAutowireSamples". Then click on finish.

Then lets add our spring dependencies in to our pom file by updating pom file as bellow.
<project xmlns="http://maven.apache.org/POM/4.0.0" xmlns:xsi="http://www.w3.org/2001/XMLSchema-instance" xsi:schemaLocation="http://maven.apache.org/POM/4.0.0 http://maven.apache.org/xsd/maven-4.0.0.xsd">
<modelVersion>4.0.0</modelVersion>
<groupId>com.sample.spring</groupId>
<artifactId>SpringAutowireSamples</artifactId>
<version>0.0.1-SNAPSHOT</version>
<properties>
<spring_version>5.1.2.RELEASE</spring_version>
</properties>
<dependencies>
<dependency>
<groupId>org.springframework</groupId>
<artifactId>spring-core</artifactId>
<version>${spring_version}</version>
</dependency>
<dependency>
<groupId>org.springframework</groupId>
<artifactId>spring-context</artifactId>
<version>${spring_version}</version>
</dependency>
</dependencies>
</project>
Then lets create our bean classes as bellow.
Address.java
package com.sample.spring.bean;
public class Address {
private String line1;
private String line2;
public String getLine1() {
return line1;
}
public void setLine1(String line1) {
this.line1 = line1;
}
public String getLine2() {
return line2;
}
public void setLine2(String line2) {
this.line2 = line2;
}
@Override
public String toString() {
return "Address [line1=" + line1 + ", line2=" + line2 + "]";
}
}
Country.java
package com.sample.spring.bean;
public class Country {
private String cntryName;
private String cntryCode;
public String getCntryName() {
return cntryName;
}
public void setCntryName(String cntryName) {
this.cntryName = cntryName;
}
public String getCntryCode() {
return cntryCode;
}
public void setCntryCode(String cntryCode) {
this.cntryCode = cntryCode;
}
@Override
public String toString() {
return "Country [cntryName=" + cntryName + ", cntryCode=" + cntryCode + "]";
}
}
Division.java
package com.sample.spring.bean;
public class Division {
private String division;
private String divisionId;
public String getDivision() {
return division;
}
public void setDivision(String division) {
this.division = division;
}
public String getDivisionId() {
return divisionId;
}
public void setDivisionId(String divisionId) {
this.divisionId = divisionId;
}
@Override
public String toString() {
return "Division [division=" + division + ", divisionId=" + divisionId + "]";
}
}
Name.java
package com.sample.spring.bean;
public class Name {
private String firstName;
private String lastName;
public String getFirstName() {
return firstName;
}
public void setFirstName(String firstName) {
this.firstName = firstName;
}
public String getLastName() {
return lastName;
}
public void setLastName(String lastName) {
this.lastName = lastName;
}
@Override
public String toString() {
return "Name [firstName=" + firstName + ", lastName=" + lastName + "]";
}
}
Student.java
package com.sample.spring.bean;
import org.springframework.beans.factory.annotation.Autowired;
public class Student {
private String stdid;
private int age;
@Autowired
Name stdName;
@Autowired
Country country;
@Autowired
Address address;
Division division;
public Student(String stdid, int age,Division division) {
super();
this.stdid = stdid;
this.age = age;
this.division = division;
}
public String getStdid() {
return stdid;
}
public void setStdid(String stdid) {
this.stdid = stdid;
}
public int getAge() {
return age;
}
public void setAge(int age) {
this.age = age;
}
@Override
public String toString() {
return "Student [ \n"
+ "stdid=" + stdid + ", \n"
+ "age=" + age + ", \n"
+ "stdName=" + stdName + ", \n"
+ "Country=" + country + ", \n"
+ "Division=" + division + ", \n"
+ "address=" + address + "\n]";
}
}
Then lets create our spring configuration file with following content. We have to put this configuration file on resources folder in our project.
spring-config.xml
<?xml version="1.0" encoding="UTF-8"?>
<beans xmlns="http://www.springframework.org/schema/beans"
xmlns:xsi="http://www.w3.org/2001/XMLSchema-instance"
xmlns:context="http://www.springframework.org/schema/context"
xsi:schemaLocation="http://www.springframework.org/schema/beans
http://www.springframework.org/schema/beans/spring-beans.xsd
http://www.springframework.org/schema/context
http://www.springframework.org/schema/context/spring-context.xsd" default-autowire="byType">
<context:annotation-config/>
<bean name="name" class="com.sample.spring.bean.Name" autowire="byName">
<property name="firstName" value="Rukshan"/>
<property name="lastName" value="Kumara"/>
</bean>
<bean name="stdName" class="com.sample.spring.bean.Name" autowire="byName">
<property name="firstName" value="Nirmal"/>
<property name="lastName" value="Balasooriya"/>
</bean>
<bean name="address1" class="com.sample.spring.bean.Address" autowire="byType">
<property name="line1" value="adress 1 line 1"/>
<property name="line2" value="adress 1 line 2"/>
</bean>
<bean name="mycountry" class="com.sample.spring.bean.Country">
<property name="cntryName" value="Sri Lanka"/>
<property name="cntryCode" value="LK"/>
</bean>
<bean name="divi" class="com.sample.spring.bean.Division">
<property name="division" value="Excellent"/>
<property name="divisionId" value="EX"/>
</bean>
<bean name="student" class="com.sample.spring.bean.Student" autowire="constructor">
<constructor-arg name="stdid" value="std0001"/>
<constructor-arg name="age" value="12"/>
<constructor-arg name="division" ref="divi"/>
</bean>
</beans>
Then lets create our spring loder and load the student bean from there.
MainClass.java
package com.sample.spring;
import org.springframework.context.support.AbstractApplicationContext;
import org.springframework.context.support.ClassPathXmlApplicationContext;
import com.sample.spring.bean.Student;
public class MainClass {
public static void main(String[] args) {
AbstractApplicationContext context = new ClassPathXmlApplicationContext("spring-config.xml");
Student student=(Student)context.getBean("student");
System.out.println(student);
context.close();
}
}
Then if we have to do maven install and run this MainClass.java class then we should get following out put.
Student [
stdid=std0001,
age=12,
stdName=Name [firstName=Nirmal, lastName=Balasooriya],
Country=Country [cntryName=Sri Lanka, cntryCode=LK],
Division=Division [division=Excellent, divisionId=EX],
address=Address [line1=adress 1 line 1, line2=adress 1 line 2]
]
This sample contains all of above mentioned Autowire mechanisms. Lets see each in more detail manner.
Constructor Autowire
In the student bean creation Spring container will invoke following bean definition in spring configuration file.
<bean name="student" class="com.sample.spring.bean.Student" autowire="constructor">
<constructor-arg name="stdid" value="std0001"/>
<constructor-arg name="age" value="12"/>
<constructor-arg name="division" ref="divi"/>
</bean>
As we can see our student have the stdId as "srd0001" , age as "12" and also Division as "Excellent". Here division loading has been done on different manner it will described on next step.
Student [
stdid=std0001,
age=12,
stdName=Name [firstName=Nirmal, lastName=Balasooriya],
Country=Country [cntryName=Sri Lanka, cntryCode=LK],
Division=Division [division=Excellent, divisionId=EX],
address=Address [line1=adress 1 line 1, line2=adress 1 line 2]
]
No (by reference) Autowire
In the Division object instantiation you can see we did not used the @Autowire annotation in the student class but on the Student bean definition we have pass the constructor argument with ref.
<bean name="divi" class="com.sample.spring.bean.Division">
<property name="division" value="Excellent"/>
<property name="divisionId" value="EX"/>
</bean>
<bean name="student" class="com.sample.spring.bean.Student" autowire="constructor">
<constructor-arg name="stdid" value="std0001"/>
<constructor-arg name="age" value="12"/>
<constructor-arg name="division" ref="divi"/>
</bean>
Thats how Spring used this no autowire to instantiate the division object in to student table.
ByName Autowire
To demonstrate byName autowire I have added following two bean configurations in to our configuration file.
<bean name="name" class="com.sample.spring.bean.Name" autowire="byName">
<property name="firstName" value="Rukshan"/>
<property name="lastName" value="Kumara"/>
</bean>
<bean name="stdName" class="com.sample.spring.bean.Name" autowire="byName">
<property name="firstName" value="Nirmal"/>
<property name="lastName" value="Balasooriya"/>
</bean>
If you can see the Student class we gave the Name variable name as stdName so when Spring container do the dependency injection it will look in to bean with that spesific bean name. So because of that we have the firstName as "Nirmal" and lastName as "Balasooriya".
Student [
stdid=std0001,
age=12,
stdName=Name [firstName=Nirmal, lastName=Balasooriya],
Country=Country [cntryName=Sri Lanka, cntryCode=LK],
Division=Division [division=Excellent, divisionId=EX],
address=Address [line1=adress 1 line 1, line2=adress 1 line 2]
]
ByType Autowire
To demonstrate byType autowire I have added following two bean configurations in to our configuration file.
<bean name="address1" class="com.sample.spring.bean.Address" autowire="byType">
<property name="line1" value="adress 1 line 1"/>
<property name="line2" value="adress 1 line 2"/>
</bean>
Based on the autowire="byType" of Address configuration in configuration file spring container injected address with line1 "adress 1 line 1" and line2 "adress 1 line 2".
Student [
stdid=std0001,
age=12,
stdName=Name [firstName=Nirmal, lastName=Balasooriya],
Country=Country [cntryName=Sri Lanka, cntryCode=LK],
Division=Division [division=Excellent, divisionId=EX],
address=Address [line1=adress 1 line 1, line2=adress 1 line 2]
]
default-autowire
If you carefully see the spring configuration I have added default-autowire in beans tag. Then added Country bean without autowire attribute in the bean definition but in our out put Spring container injected the Country using this default-autowire configuration.
<beans xmlns="http://www.springframework.org/schema/beans"
xmlns:xsi="http://www.w3.org/2001/XMLSchema-instance"
xmlns:context="http://www.springframework.org/schema/context"
xsi:schemaLocation="http://www.springframework.org/schema/beans
http://www.springframework.org/schema/beans/spring-beans.xsd
http://www.springframework.org/schema/context
http://www.springframework.org/schema/context/spring-context.xsd" default-autowire="byType">
<bean name="mycountry" class="com.sample.spring.bean.Country">
<property name="cntryName" value="Sri Lanka"/>
<property name="cntryCode" value="LK"/>
</bean>
In the out put default-autowire used to provide Country values cntryName as "Sri Lanka" and cntryCode as "LK".
Student [
stdid=std0001,
age=12,
stdName=Name [firstName=Nirmal, lastName=Balasooriya],
Country=Country [cntryName=Sri Lanka, cntryCode=LK],
Division=Division [division=Excellent, divisionId=EX],
address=Address [line1=adress 1 line 1, line2=adress 1 line 2]
]