Showing posts with label JBoss EAP. Show all posts

Monday, April 6, 2020

Upload Large Files in JBoss EAP - Resolve UT000020: Connection terminated as request was larger than 10485760

In this post I will demonstrate how to resolve "UT000020: Connection terminated as request was larger than 10485760". This error because of the file that we going to upload exceeds maximum size allowed in default configuration (10MB) on JBoss EAP. For demonstration purposes I will use JackRabbit post code.

For the testing purposes I have added new Image (LARGE.JPG) in to resource folder and if you try to execute following command in browser you will hit an error.

http://localhost:9090/uploadResource/large

2020-04-06 19:41:40.693 ERROR 21016 --- [nio-9090-exec-1] o.s.boot.web.support.ErrorPageFilter     : Forwarding to error page from request [/uploadResource/large] due to exception [org.apache.http.NoHttpResponseException: localhost:8080 failed to respond]

javax.jcr.RepositoryException: org.apache.http.NoHttpResponseException: localhost:8080 failed to respond
at org.apache.jackrabbit.spi2davex.RepositoryServiceImpl$BatchImpl.start(RepositoryServiceImpl.java:634) ~[jackrabbit-spi2dav-2.19.3.jar:2.19.3]
at org.apache.jackrabbit.spi2davex.RepositoryServiceImpl$BatchImpl.access$600(RepositoryServiceImpl.java:569) ~[jackrabbit-spi2dav-2.19.3.jar:2.19.3]


Exception in the Spring-Boot application


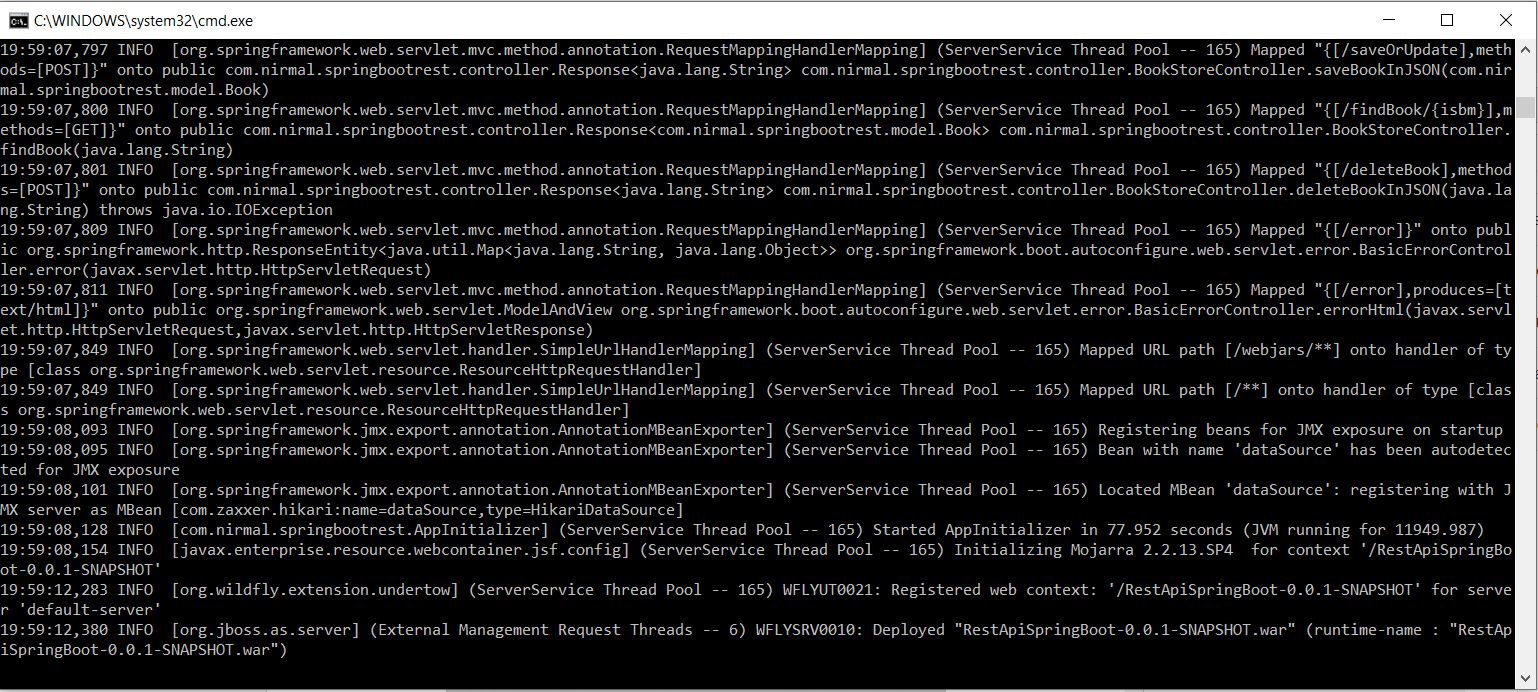
Also if you check in JBoss log you should be see following exception.

19:41:40,712 ERROR [org.apache.jackrabbit.server.util.HttpMultipartPost] (default task-15) Error while processing multipart.: org.apache.commons.fileupload.FileUploadBase$IOFileUploadException: Processing of multipart/form-data request failed. UT000020: Connection terminated as request was larger than 10485760
        at org.apache.commons.fileupload.FileUploadBase.parseRequest(FileUploadBase.java:351)
        at org.apache.commons.fileupload.servlet.ServletFileUpload.parseRequest(ServletFileUpload.java:115)
        at org.apache.jackrabbit.server.util.HttpMultipartPost.extractMultipart(HttpMultipartPost.java:76)
        at org.apache.jackrabbit.server.util.HttpMultipartPost.<init>(HttpMultipartPost.java:51)
        at org.apache.jackrabbit.server.util.RequestData.<init>(RequestData.java:36)
        at org.apache.jackrabbit.server.remoting.davex.JcrRemotingServlet.doPost(JcrRemotingServlet.java:416)
        at org.apache.jackrabbit.webdav.server.AbstractWebdavServlet.execute(AbstractWebdavServlet.java:372)
        at org.apache.jackrabbit.webdav.server.AbstractWebdavServlet.service(AbstractWebdavServlet.java:308)
        at javax.servlet.http.HttpServlet.service(HttpServlet.java:790)
        at io.undertow.servlet.handlers.ServletHandler.handleRequest(ServletHandler.java:85)
        at 


Exception in JBoss EAP

The main reason for this exception is we are trying to upload a file which size is larger than the default allowed size in JBoss.

Lets see how we can configure to allow JBoss to configure it for 100MB file.
First You have to log in to JBoss EAP admin console(http://127.0.0.1:9990/console/App.html#home) using username and password.

Then navigate to Configuration page and then click on "SubSystems" in left panel then click on "Web/HTTP - Undertow". Then Click on  view button on "HTTP". Please refer to below image.


Then you should able to view similar page to below figure. Then click on "HTTP SERVER" Tab and click on View button as show in below figure.


Then click on "HTTP Listener" in right side panel and then click on Edit button as show in below figure.


Then find the parameter name "Max post size" and set value as "104857600" (this is in byte value) which equal to 100 MB. Then Click save button and re-lode the server.

After that change if you try to upload large file by following URL it will get sucess.

http://localhost:9090/uploadResource/large

You could see following output on web browser.

{"code":"1","desc":"Resource Added Successfully","t":null}


also if you try to access that image using following URL you should be able to see uploaded image.


Code base for this can be found in following GITHUB location

Friday, March 20, 2020

Enable SSL in JBoss EAP 7.1

In this post I will demonstrate how to enable SSL in JBoss EAP 7.1 and I will use "" post for the demonstration purposes.

Prerequisites 
  1. You should have install java 1.8 or above.
  2. You should have Eclipse installed in your PC.
  3. Your PC should setup Maven installed and configured.
  4. MS SQL server need to be installed. 
  5.  You need to have JBoss EAP instance in your PC.


Lets deploy the application 

First check out the project from GitHub repository related my my previous post "spring-boot-rest-api-with-sqlserver-2019"
First lets enable Database user name and password on application properties by removing "#" marks in-front of spring.datasource.username and spring.datasource.password.  

#==== connect to mysql ======#
spring.jpa.hibernate.ddl-auto=update
spring.datasource.url=jdbc:sqlserver://localhost;databaseName=TestDB
spring.datasource.username=nirmal
spring.datasource.password=Test123_

spring.datasource.driverClassName=com.microsoft.sqlserver.jdbc.SQLServerDriver
spring.jpa.database-platform=org.hibernate.dialect.SQLServer2012Dialect
server.port = 8080

spring.jpa.properties.hibernate.show_sql=true
spring.jpa.properties.hibernate.use_sql_comments=false
spring.jpa.properties.hibernate.format_sql=true
#==== Logging configurations ======#
logging.level.root=WARN,INFO,ERROR
logging.level.com.baeldung=TRACE


First perform maven install and generate the war as show in figure below.


Then lets start the JBoss EAP by double click on standalon.exe in windows or running standalone.sh file in linux.  When EAP starts you can see following warning message has been display in the console. 

WARN  [org.jboss.as.domain.management.security] (MSC service thread 1-7) WFLYDM0111: Keystore G:\Programs\Servers\jboss-eap-7.1.0_1\jboss-eap-7.1\standalone\configuration\application.keystore not found, it will be auto generated on first use with a self signed certificate for host localhost

Warning related Keystore missing certificate

How ever first lets deploy the war file in to EAP and see whether its functioning. After starting the EAP go to JBoss Admin console  and navigate to Deployments tab. Then deploy your generated war file.

Now you should be able to access following URL
http://localhost:8080/RestApiSpringBoot-0.0.1-SNAPSHOT/findBook/1

And in browser you should be able to see similar output.

REST get API output


Lets generate the Key 

To generate the SSL key we are using Java "keytool". In order to generate the key open command prompt as Administrator and navigate Java installation directory. Then you can execute following command.

keytool.exe -genkey -alias server -keyalg RSA -keystore application.keystore -validity 2000


Once you enter above mentions command then first it will ask for the password I will use default password as "password". Then it will ask some basic details about your server you can provide your own details and will not have impact on these for now.

What is your first and last name?
Nirmal Balasooriya
What is the name of your organizational unit?
NimralBalasooriyaBlog
What is the name of your organization?
NirmalBalasooriyaBlog
What is the name of your City or Locality?
Singapore
What is the name of your State or Province?
Singapore
What is the two-letter country code for this unit?
SG
Is CN=Nirmal Balasooriya, OU=NimralBalasooriyaBlog, O=NirmalBalasooriyaBlog, L=Singapore, ST=Singapore, C=SG correct?
Yes

After these details it will ask you to enter password for another time for verification.

Generation of ssl key

Actually these details already configured in the standalone.xml in "<EAP_BASE_DIR>\standalone\configuration" directory. If you open the xml file and search for following "<security-realm name="ApplicationRealm">" in xml you can find these configurations as show below.


            <security-realm name="ApplicationRealm">
                <server-identities>
                    <ssl>
                        <keystore path="application.keystore" relative-to="jboss.server.config.dir" keystore-password="password" alias="server" key-password="password" generate-self-signed-certificate-host="localhost"/>
                    </ssl>
                </server-identities>
                <authentication>
                    <local default-user="$local" allowed-users="*" skip-group-loading="true"/>
                    <properties path="application-users.properties" relative-to="jboss.server.config.dir"/>
                </authentication>
                <authorization>
                    <properties path="application-roles.properties" relative-to="jboss.server.config.dir"/>
                </authorization>
            </security-realm>


So we are generated our ssl key based on this default configuration. Now you should be able to see new file "application.keystore" has been generated in Java bin folder. Then copy and past that file in to "<EAP_BASE_DIR>\standalone\configuration"


Lets test the application with SSL

After above modifications lets restart the JBoss EAP. Now you should be able to see similar out put as show in below.

Now you will not able to see previous warning that generated When EAP starts. Also you should able to see EAP is listening for HTTPS port as well.

INFO  [org.wildfly.extension.undertow] (MSC service thread 1-7) WFLYUT0006: Undertow HTTPS listener https listening on 127.0.0.1:8443


SSL is enable in EAP 7.1


Now if you try to access our web service with HTTPS following URL.

https://localhost:8443/RestApiSpringBoot-0.0.1-SNAPSHOT/findBook/1

Browser will give you warning that we are going to access "Your connection is not private" as show below.

Then click me Help me to understand and then Proceed to localhost (unsafe)


Then You should be able to see similar output as below.


Friday, March 13, 2020

Setup MICROSOFT SQL SERVER Data source in JBoss EAP 7.1

In this post I will demonstrate how to setup Microsoft SQL Server Data source in JBoss EAP 7.1. I will use code base of my previous post "Passing spring application parameters in EAP 7.1"(Initial code base)

Prerequisites 


  1. You should have install java 1.8 or above.
  2. You should have Eclipse installed in your PC.
  3. Your PC should setup Maven installed and configured.
  4. Your PC should have installed MySQL and Server need to have user who have access to the configured database and user should able to log in to the database by user name/password. 

Install MSSQL driver in JBoss EAP

First lets download a JDBC Driver based on SQLServer version. You can download the JDBC Driver from Microsoft's site: https://docs.microsoft.com/en-us/sql/connect/jdbc/microsoft-jdbc-driver-for-sql-server

I downloaded the "sqljdbc4-2.0.jar" which compatible with my SQL server version. Lets keep the downloaded jar in temporary folder. In my case I'll keep it on "G:/" drive. 


So lets use "JBoss-cli" in order to add the Driver and JNDI in to EAP. You can find the jboss-cli in <JBOSS_HOM>/bin directory.

You can start the EAP first by double click on standalone.bat and then start jboss-cli by double click jboss-cli.jar.

Then you can enter connect command in order to connect to EAP.

connect

Then you can enter following command

module add --name=sqlserver.jdbc --resources=@INSTALL_FOLDER@/libext/jtds-1.3.1.jar --dependencies=javax.api,javax.transaction.api
/subsystem=datasources/jdbc-driver=sqlserver:add(driver-module-name=sqlserver.jdbc,driver-name=sqlserver,driver-class-name=@JDBC_DRIVER@)
/subsystem=datasources/data-source=@DATASOURCENAME@:add(jndi-name=java:jboss/@JNDI_NAME@,enabled="true",use-java-context="true",driver-name=sqlserver,connection-url="@JDBC_URL@",user-name=@JDBC_USER@,password=@JDBC_PASSWORD@,validate-on-match=true,background-validation=true)

This is stranded command which you can replace with your parameters. So based on my parameter details Command would be something like below. I have highlighted the modifications which I have done.


module add --name=sqlserver.jdbc --resources=G:\sqljdbc4-2.0.jar --dependencies=javax.api,javax.transaction.api
/subsystem=datasources/jdbc-driver=sqlserver:add(driver-module-name=sqlserver.jdbc,driver-name=sqlserver,driver-class-name=com.microsoft.sqlserver.jdbc.SQLServerDriver)
/subsystem=datasources/data-source=MSSQLDATASOURCE:add(jndi-name=java:jboss/MSSQLJNDI,enabled="true",use-java-context="true",driver-name=sqlserver,connection-url="jdbc:sqlserver://localhost;databaseName=TestDB",user-name=nirmal,password=Test123_,validate-on-match=true,background-validation=true)

Once you run the command you should be able to see following output in jboss-cli.


Then also you can see following section has been added in to the standalone.xml


Lets configure Application to read JNDI

In order to read the DataSource details from JNDI just need to add JNDI string in to Spring Boot application.properties file. I have added spring.datasource.jndi-name=java:jboss/MSSQLJNDI@ application.properties file. (Note that I have commented previous datasource configuration details )

#==== connect to MSSQL ======#
#spring.jpa.hibernate.ddl-auto=update
#spring.datasource.url=jdbc:sqlserver://localhost;databaseName=TestDB
##spring.datasource.username=nirmal
##spring.datasource.password=Test123_
#spring.datasource.driverClassName=com.microsoft.sqlserver.jdbc.SQLServerDriver
#spring.jpa.database-platform=org.hibernate.dialect.SQLServer2012Dialect
server.port = 8080
spring.datasource.jndi-name=java:jboss/MSSQLJNDI@

spring.jpa.properties.hibernate.show_sql=true
spring.jpa.properties.hibernate.use_sql_comments=false
spring.jpa.properties.hibernate.format_sql=true

#==== Logging configurations ======#
logging.level.root=WARN,INFO,ERROR
logging.level.com.baeldung=TRACE


Then lets deploy the war file. For that click on Back button on left top corner and then click on deployments. Then click "Add" button. Then you should be able to see similar figure to below.


Then click next button and then Click choose file and select the generated war file from target folder in the project. Then click next and then click finish. Once installation completed you should be able to see similar output on command line.


Also you can perform any action which I mentioned in my previous blog post.

Project source can be downloaded from following GIT HUB URL.


Saturday, March 7, 2020

Managing resources using Jackrabbit with Spring Boot

In this post I will demonstrate how to work with Jackrabbit content repository with Spring Boot application. The Apache Jackrabbit content repository is a fully conforming implementation of the Content Repository for Java Technology API. A content repository is a hierarchical content store with support for structured and unstructured content, full text search, versioning, transactions, observation etc.


Prerequisites 
  1. You should have install java 1.8 or above.
  2. You should have Eclipse/IntelliJ Idea installed in your PC.
  3. Your PC should setup Maven installed and configured.


Lets setup Jackrabbit 

You can download the latest jackrabbit from official Jackrabbit web page . I will download the war file and deploy it on JBoss EAP.
To deploy it in to JBoss EAP you should have access the web admin console. In there  go to Deployments and click "Add" button show in figure below. Then click next and select the war file you downloaded. Then click next and then click finish.


Once you successfully installed the application you should be able to access the default jackrabit web interface from http://localhost:8080/jackrabbit-webapp-2.18.5/ you should see similar page as show below.


Create your first repository by click on "Create Content Repository". By click on this button system will create the default Jackrabbit repository with default settings.

Success Page of JackRabbit repository creation 


Now when you access Jackrabbit default URL you will be able to see as follows.


When you create this repository JBoss EAP will create new folder call "jackrabbit" on <JBOSS_HOME_DIR>/bin folder. As show in below.


Lets create project 

Open InelliJ IDEA and create new maven project. I will using following details for the project.

groupId    : com.nirmal.JackrabbitSpringBoot
artifactId : JackrabbitSpringBoot

I will add relevant dependencies in to the POM file as show below.

<?xml version="1.0" encoding="UTF-8"?>
<project xmlns="http://maven.apache.org/POM/4.0.0"
         xmlns:xsi="http://www.w3.org/2001/XMLSchema-instance"
         xsi:schemaLocation="http://maven.apache.org/POM/4.0.0 http://maven.apache.org/xsd/maven-4.0.0.xsd">
    <modelVersion>4.0.0</modelVersion>

    <groupId>com.nirmal.JackrabbitSpringBoot</groupId>
    <artifactId>JackrabbitSpringBoot</artifactId>
    <version>1.0-SNAPSHOT</version>
    <parent>
        <groupId>org.springframework.boot</groupId>
        <artifactId>spring-boot-starter-parent</artifactId>
        <version>1.5.1.RELEASE</version>
        <relativePath />
    </parent>

    <properties>
        <project.build.sourceEncoding>UTF-8</project.build.sourceEncoding>
        <project.reporting.outputEncoding>UTF-8</project.reporting.outputEncoding>
        <java.version>1.8</java.version>
    </properties>

    <dependencies>
        <dependency>
            <groupId>javax.servlet</groupId>
            <artifactId>jstl</artifactId>
        </dependency>
        <dependency>
            <groupId>org.springframework.boot</groupId>
            <artifactId>spring-boot-starter-web</artifactId>
        </dependency>
        <dependency>
            <groupId>org.springframework.boot</groupId>
            <artifactId>spring-boot-starter-test</artifactId>
            <scope>test</scope>
        </dependency>
        <!-- Provided -->
        <dependency>
            <groupId>org.apache.tomcat.embed</groupId>
            <artifactId>tomcat-embed-jasper</artifactId>
            <scope>provided</scope>
        </dependency>
        <dependency>
            <groupId>org.springframework.boot</groupId>
            <artifactId>spring-boot-starter-data-jpa</artifactId>
        </dependency>
        <dependency>
            <groupId>com.microsoft.sqlserver</groupId>
            <artifactId>mssql-jdbc</artifactId>
            <version>6.1.0.jre8</version>
        </dependency>

        <!-- The JCR API -->
        <dependency>
            <groupId>javax.jcr</groupId>
            <artifactId>jcr</artifactId>
            <version>2.0</version>
        </dependency>

        <!-- Jackrabbit content repository -->
        <dependency>
            <groupId>org.apache.jackrabbit</groupId>
            <artifactId>jackrabbit-core</artifactId>
            <version>2.18.1</version>
        </dependency>
        <dependency>
            <groupId>org.apache.jackrabbit</groupId>
            <artifactId>jackrabbit-jcr2dav</artifactId>
            <version>2.19.3</version>
        </dependency>
        <dependency>
            <groupId>org.apache.jackrabbit</groupId>
            <artifactId>jackrabbit-jcr-commons</artifactId>
            <version>2.19.3</version>
        </dependency>

    </dependencies>
    <build>
        <plugins>
            <plugin>
                <groupId>org.springframework.boot</groupId>
                <artifactId>spring-boot-maven-plugin</artifactId>
            </plugin>
        </plugins>
    </build>
</project>


Then I will add application.properties file in resources folder with following content. note that I will use default jackrabit user name and password in this demonstration. Jackrabit url can be get as following format http://<ip address>:<port>/<contextpathOfJackrabitserver>/server

#==== connect to mssql ======#
spring.jpa.hibernate.ddl-auto=update
spring.datasource.url=jdbc:sqlserver://localhost;databaseName=TestDB
spring.datasource.username=nirmal
spring.datasource.password=Test123_
spring.datasource.driverClassName=com.microsoft.sqlserver.jdbc.SQLServerDriver
spring.jpa.database-platform=org.hibernate.dialect.SQLServer2012Dialect
server.port = 9090

spring.jpa.properties.hibernate.show_sql=true
spring.jpa.properties.hibernate.use_sql_comments=false
spring.jpa.properties.hibernate.format_sql=true

#jackrabbit configs
jackrabbit.username=admin
jackrabbit.userpassword=admin
jackrabbit.url=http://localhost:8080/jackrabbit-webapp-2.18.5/server


Then I will add spring boot startup class as  AppInitializer class with following content in "com.nirmal.JackrabbitSpringBoot.app" package.

package com.nirmal.JackrabbitSpringBoot.app;
    import javax.sql.DataSource;
    import org.springframework.beans.factory.annotation.Autowired;
    import org.springframework.boot.SpringApplication;
    import org.springframework.boot.autoconfigure.SpringBootApplication;
    import org.springframework.boot.builder.SpringApplicationBuilder;
    import org.springframework.boot.web.support.SpringBootServletInitializer;
    import org.springframework.context.annotation.ComponentScan;

/**
 * Spring Boot initialization class of the JackrabbitSpringBoot project
 *
 * @author Nirmal Balasooriya
 *
 */

//@EnableJpaRepositories("com.nirmal.springbootrest")
@SpringBootApplication(scanBasePackages = { "com.nirmal.JackrabbitSpringBoot.app" })
@ComponentScan({"com.nirmal.JackrabbitSpringBoot.app"})
public class AppInitializer extends SpringBootServletInitializer {

    @Autowired
    DataSource dataSource;

    @Override
    protected SpringApplicationBuilder configure(SpringApplicationBuilder application) {
        return application.sources(AppInitializer.class);
    }

    public static void main(String[] args) {
        SpringApplication.run(AppInitializer.class, args);
    }
}


Next Lets add the Controller. In my controller it will have two API methods call "getImage" and "uploadResource". Both will take both will take path variable call "resourceName". (This is image name without extension). Full controller will be as below.


package com.nirmal.JackrabbitSpringBoot.app;

import org.apache.tika.io.IOUtils;
import org.slf4j.Logger;
import org.slf4j.LoggerFactory;
import org.springframework.core.io.ClassPathResource;
import org.springframework.core.io.Resource;
import org.springframework.http.MediaType;
import org.springframework.stereotype.Component;
import org.springframework.stereotype.Controller;
import org.springframework.web.bind.annotation.GetMapping;
import org.springframework.web.bind.annotation.PathVariable;
import org.springframework.web.bind.annotation.ResponseBody;
import org.springframework.beans.factory.annotation.Value;

import javax.jcr.*;

import org.apache.jackrabbit.commons.JcrUtils;
import java.io.InputStream;

@Controller
@Component
public class MainController {

    Logger logger = LoggerFactory.getLogger(MainController.class);

    @Value("${jackrabbit.username}")
    private String username;

    @Value("${jackrabbit.userpassword}")
    private String userPassword;

    @Value("${jackrabbit.url}")
    private String jackrabbitUrl;

    @GetMapping("/uploadResource/{resourceName}")
    @ResponseBody
    public Response uploadResource(@PathVariable("resourceName")String resourceName) throws Exception {
        logger.info("Upload resource resourceName : " + resourceName);
        JackRabitResource jackRabitResource=new JackRabitResource();
        resourceName=resourceName+".jpg";
        Response<JackRabitResource> response = new Response<JackRabitResource>("0", "Resource does not exist", null);
        if (new ClassPathResource(resourceName).exists()){
            uploadFile(resourceName);
            response = new Response<JackRabitResource>("1", "Resource Added Successfully", jackRabitResource);
        }
        return response;
    }

    @GetMapping(
            value = "/getImage/{resourceName}",
            produces = MediaType.IMAGE_JPEG_VALUE
    )
    public @ResponseBody byte[] getImage(@PathVariable("resourceName")String resourceName) throws Exception {
        logger.info("Get Image resourceName : " + resourceName);
        resourceName=resourceName+".jpg";
        if (new ClassPathResource(resourceName).exists()){
            try {
                return getContent(resourceName);
            }catch (PathNotFoundException e){
                return null;
            }

        }
        return null;
    }

    public void uploadFile(String name) throws Exception{
        Repository repository = JcrUtils.getRepository(jackrabbitUrl);
        Session session = repository.login(
                new SimpleCredentials(username, userPassword.toCharArray()));
        try{
            Resource resource = new ClassPathResource(name);
            InputStream stream = resource.getInputStream();
            Node folder = session.getRootNode();
            Node file = folder.addNode(name,"nt:file");
            Node content = file.addNode("jcr:content","nt:resource");
            Binary binary = session.getValueFactory().createBinary(stream);
            content.setProperty("jcr:data",binary);
            content.setProperty("jcr:mimeType","image/gif");
            session.save();
        }finally{
            session.logout();
        }
    }

    public byte[] getContent(String name) throws Exception{

        Repository repository = JcrUtils.getRepository(jackrabbitUrl);
        Session session = repository.login(
                new SimpleCredentials(username, userPassword.toCharArray()));
        Node folder = session.getRootNode();
        Node file=folder.getNode(name);
        Node content=file.getNode("jcr:content");
        String path = content.getPath();
        Binary bin = session.getNode(path).getProperty("jcr:data").getBinary();
        InputStream stream = bin.getStream();
        return IOUtils.toByteArray(stream);
    }
}


For testing purposes I will put two jpg images in resource folder so after all there you could see similar project structure as below figure.

Final project structure 


Lets run the applciation

You can perform maven install command on the project and then you can run the application by following command in target folder. Make sure that JBoss EAP which we deployed jackrabbit server running while you are testing.

java -jar JackrabbitSpringBoot-1.0-SNAPSHOT.jar

Once application successfully started you could see similar console output as show below.


Also you should be able to access following URL from browser http://localhost:9090/getImage/srilanka and should get following output on web browser.


Then lets try to upload two images in to jackrabbit repository which I added in side the resource folder. You can brows following URL and should able to get respective outputs as well.


Since both resources "srilanka.jpg" and "colombo.jpg" available in resources folder both occasions it will return following output.

{"code":"1","desc":"Resource Added Successfully","t":null}

In case if you try to access not available resource as below.


{"code":"0","desc":"Resource does not exist","t":null}

So now we can access our jackrabit repository from following URL and see whether resources are uploaded.
http://localhost:8080/jackrabbit-webapp-2.18.5/repository/default/

You should be able to see as following 


Then lets try to access resources in Jackrabbit repository. for respective URLs should return similar output as show below.

http://localhost:9090/getImage/srilanka
Retrieving image from repository


http://localhost:9090/getImage/colombo
Retrieving image from repository

You can find the code base related to this project from following FITHUB location. 

Thursday, March 5, 2020

Passing spring application parameters in EAP 7.1

In this post I will demonstrate how to pass Spring application properties in Spring Boot spring boot application running on JBoss EAP. I will use code base of my previous post "SpringBott change default port"(Initial code base)

Prerequisites 


  1. You should have install java 1.8 or above.
  2. You should have Eclipse installed in your PC.
  3. Your PC should setup Maven installed and configured.
  4. Your PC should have installed MySQL and Server need to have user who have access to the configured database and user should able to log in to the database by user name/password. 


Enable existing project to run on EAP

When Spring boot application developed it's have its embedded tomcat. So we have to remove that embedded tomcat in order to run the same project in EAP. Also I have make the project packaging as war file so we can deploy the project in to EAP.


<project xmlns="http://maven.apache.org/POM/4.0.0" xmlns:xsi="http://www.w3.org/2001/XMLSchema-instance" xsi:schemaLocation="http://maven.apache.org/POM/4.0.0 http://maven.apache.org/xsd/maven-4.0.0.xsd">
  <modelVersion>4.0.0</modelVersion>
  <groupId>com.nirmal.springbootrest</groupId>
  <artifactId>RestApiSpringBoot</artifactId>
  <version>0.0.1-SNAPSHOT</version>
<packaging>war</packaging>
<parent>
        <groupId>org.springframework.boot</groupId>
        <artifactId>spring-boot-starter-parent</artifactId>
        <version>2.0.5.RELEASE</version>
    </parent>
<dependencies>
<!-- Compile -->
<dependency>
<groupId>org.springframework.boot</groupId>
<artifactId>spring-boot-starter-web</artifactId>
<exclusions>
<exclusion>
<groupId>org.springframework.boot</groupId>
<artifactId>spring-boot-starter-tomcat</artifactId>
</exclusion>
</exclusions>
</dependency>
        <dependency>
            <groupId>org.springframework.boot</groupId>
            <artifactId>spring-boot-starter-data-jpa</artifactId>
        </dependency>
<dependency>
<groupId>javax.servlet</groupId>
<artifactId>jstl</artifactId>
</dependency>
<!-- Provided -->
  <dependency>
   <groupId>org.apache.tomcat.embed</groupId>
   <artifactId>tomcat-embed-jasper</artifactId>
   <scope>provided</scope>
  </dependency>
<!-- Runtime -->
<dependency>
<groupId>com.microsoft.sqlserver</groupId>
<artifactId>mssql-jdbc</artifactId>
<version>6.1.0.jre8</version>
</dependency>
</dependencies>
<build>
<plugins>
<plugin>
<groupId>org.springframework.boot</groupId>
<artifactId>spring-boot-maven-plugin</artifactId>
</plugin>
</plugins>
</build>
</project>

Then lets remove some required parameters from application.properties file as show in below. I have highlighted the commented part.

#==== connect to mysql ======#
spring.jpa.hibernate.ddl-auto=update
spring.datasource.url=jdbc:sqlserver://localhost;databaseName=TestDB
#spring.datasource.username=nirmal
#spring.datasource.password=Test123_
spring.datasource.driverClassName=com.microsoft.sqlserver.jdbc.SQLServerDriver
spring.jpa.database-platform=org.hibernate.dialect.SQLServer2012Dialect
server.port = 8080

spring.jpa.properties.hibernate.show_sql=true
spring.jpa.properties.hibernate.use_sql_comments=false
spring.jpa.properties.hibernate.format_sql=true

#==== Logging configurations ======#
logging.level.root=WARN,INFO,ERROR
logging.level.com.baeldung=TRACE


Perform maven install

I will demonstrate it from IntelliJ as mention below. First perform maven install command by double click on "install" under maven in InelliJ as show below.


Then after successful installation you can see generated war file in target folder. 


Add application properties in EAP

First lets run the JBoss EAP. For that go to the JBOSS directory and navigate to "bin" folder. Then run the "standalone.bat" in windows. (In linux run the standalone.sh file). Once EAP started you can go to Admin console in following URL. http://localhost:9990/console/App.html

Enter the admin username and password when accessing the URL. Then you should be able to see EAP web application. Then click on Configuration tab and then click on system properties. Then you should be able to see similar UI to below screen. Then click on view button.


Then you should be able to see similar image to below figure. 


In order to add parameters click on Add button. Then add following details 

namevalue
spring.datasource.usernamenirmal
spring.datasource.passwordTest123_


After add those you can see similar to below figure.


Then lets deploy the war file. For that click on Back button on left top corner and then click on deployments. Then click "Add" button. Then you should be able to see similar figure to below.


Then click next button and then Click choose file and select the generated war file from target folder in the project. Then click next and then click finish. Once installation completed you should be able to see similar output on command line.


Now server started on 8090 and you should be able to access same web service from following like.


Also you can perform any action which I mentioned in my previous blog post.

Project source can be downloaded from following GIT HUB URL.