Prerequisites
- You should have install java 1.8 or above.
- You should have Eclipse installed in your PC.
- Your PC should setup Maven installed and configured.
Lets create the maven project on Eclipse go to File -> New -> Maven Project then tick on Creat a simple project and click next. (As show in bellow figure)

Then provide Group Id and Artifact Id and change the packaging as war as show in bellow figure. Then click on finish.

Then change the project JRE to JDK on Java Build Path on the project.
The main advantage on SpringBoot is its reduces lots of development time and increases productivity. In order to use SpringBoot with Hibernate we have to add required dependencies as show in bellow on pom.xml.
<project xmlns="http://maven.apache.org/POM/4.0.0" xmlns:xsi="http://www.w3.org/2001/XMLSchema-instance" xsi:schemaLocation="http://maven.apache.org/POM/4.0.0 http://maven.apache.org/xsd/maven-4.0.0.xsd">
<modelVersion>4.0.0</modelVersion>
<groupId>com.springboot.sample</groupId>
<artifactId>SpringBootWeb</artifactId>
<version>0.0.1-SNAPSHOT</version>
<packaging>war</packaging>
<parent>
<groupId>org.springframework.boot</groupId>
<artifactId>spring-boot-starter-parent</artifactId>
<version>2.0.5.RELEASE</version>
</parent>
<dependencies>
<!-- Compile -->
<dependency>
<groupId>org.springframework.boot</groupId>
<artifactId>spring-boot-starter-web</artifactId>
</dependency>
<dependency>
<groupId>org.springframework.boot</groupId>
<artifactId>spring-boot-starter-data-jpa</artifactId>
</dependency>
<dependency>
<groupId>javax.servlet</groupId>
<artifactId>jstl</artifactId>
</dependency>
<!-- Provided -->
<dependency>
<groupId>org.apache.tomcat.embed</groupId>
<artifactId>tomcat-embed-jasper</artifactId>
<scope>provided</scope>
</dependency>
<!-- Runtime -->
<dependency>
<groupId>mysql</groupId>
<artifactId>mysql-connector-java</artifactId>
<version>5.1.6</version>
</dependency>
</dependencies>
<build>
<plugins>
<plugin>
<groupId>org.springframework.boot</groupId>
<artifactId>spring-boot-maven-plugin</artifactId>
</plugin>
<finalName>SpringBootWeb</finalName>
</plugins>
</build>
</project>
Spring Boot allows developers to configure their application using a configuration file named application.properties. This configuration file should put in the src/main/resource folder. For our application we use following configurations on application.properties file.
spring.mvc.view.prefix: /WEB-INF/jsp/
spring.mvc.view.suffix: .jsp
application.message: Hello world
#==== connect to mysql ======#
spring.jpa.hibernate.ddl-auto=update
spring.datasource.url=jdbc:mysql://localhost:3306/sample?useSSL=false
spring.datasource.username=root
spring.datasource.password=
spring.datasource.driver-class-name=com.mysql.jdbc.Driver
spring.jpa.properties.hibernate.dialect = org.hibernate.dialect.MySQL5Dialect

Configuration file content
Then lets create simple table on MySQL using following SQL.
--
-- Table structure for table `country`
--
DROP TABLE IF EXISTS `country`;
CREATE TABLE `country` (
`id` int(11) NOT NULL AUTO_INCREMENT,
`name` varchar(250) NOT NULL,
`code` varchar(10) NOT NULL,
PRIMARY KEY (`id`)
)
Then add following countries in to table.
--
-- Dumping data for table `country`
--
INSERT INTO `country` (`id`, `name`, `code`) VALUES
(1, 'Sri Lanka', 'SL'),
(2, 'Singapore', 'SG'),
(3, 'India', 'IN');
COMMIT;
Then lets try to load these countries on JSP page using Hibernate with SpringBoot.
First of all lets create model class for country as bellow.
package com.sample.springboot.dao.model;
import javax.persistence.Entity;
import javax.persistence.*;
@Entity
@Table(name = "country")
public class Country {
@Id
@GeneratedValue(strategy = GenerationType.AUTO)
@Column(name="id")
private long id;
private String name;
private String code;
public long getId() {
return id;
}
public void setId(long id) {
this.id = id;
}
public String getName() {
return name;
}
public void setName(String name) {
this.name = name;
}
public String getCode() {
return code;
}
public void setCode(String code) {
this.code = code;
}
}
Then lets create CountryDao interface for country model by using CrudRepository.
package com.sample.springboot.dao;
import org.springframework.data.repository.CrudRepository;
import org.springframework.stereotype.Repository;
import com.sample.springboot.dao.model.Country;
@Repository
public interface CountryDao extends CrudRepository<Country,Long> {
}
Then lets create Controller class to do the URL mapping for "/" which mean when loading our application this controller will tel what application container should do. Lets implement our controller as bellow.
package com.sample.springboot.controller;
import java.util.Map;
import javax.sql.DataSource;
import org.springframework.beans.factory.annotation.Autowired;
import org.springframework.beans.factory.annotation.Value;
import org.springframework.stereotype.Controller;
import org.springframework.web.bind.annotation.GetMapping;
import com.sample.springboot.dao.CountryDao;
import com.sample.springboot.dao.model.Country;
@Controller
public class MyController {
@Autowired
DataSource dataSource;
@Autowired
CountryDao systemRepository;
@Value("${application.message:Hello World}")
private String message;
@GetMapping("/")
public String welcome(Map<String, Object> model) {
String countries="";
Iterable<Country> systemlist = systemRepository.findAll();
System.out.println("here are system count: " + systemlist.toString());
for(Country country:systemlist){
countries+=country.getName()+" ";
System.out.println("Here is a system: " + country.toString());
}
model.put("message", this.message);
model.put("countries", countries);
return "Hello";
}
}
Then lets add our Hello JSP page in to the application. Accoutering to our configuration file it should be place in webapp/WEB-INF/jsp. Lets add following content in to that. It will simply print two messages "message" and "countries".
<!DOCTYPE html>
<body>
Welcome to Spring Boot JSP page
<br>
Message: ${message}
<br>
<br>
List of countries from DB: ${countries}
</body>
</html>
After that lets create our entry point for the web application. Lets Name it as MyApp.java with following contents.
package com.sample.springboot;
import javax.sql.DataSource;
import org.springframework.beans.factory.annotation.Autowired;
import org.springframework.boot.SpringApplication;
import org.springframework.boot.autoconfigure.SpringBootApplication;
import org.springframework.boot.builder.SpringApplicationBuilder;
import org.springframework.boot.web.servlet.support.SpringBootServletInitializer;
import org.springframework.data.jpa.repository.config.EnableJpaRepositories;
@SpringBootApplication
@EnableJpaRepositories("com.sample.springboot")
public class MyApp extends SpringBootServletInitializer{
@Autowired
DataSource dataSource;
@Override
protected SpringApplicationBuilder configure(SpringApplicationBuilder application) {
return application.sources(MyApp.class);
}
public static void main(String[] args) {
SpringApplication.run(MyApp.class, args);
}
}
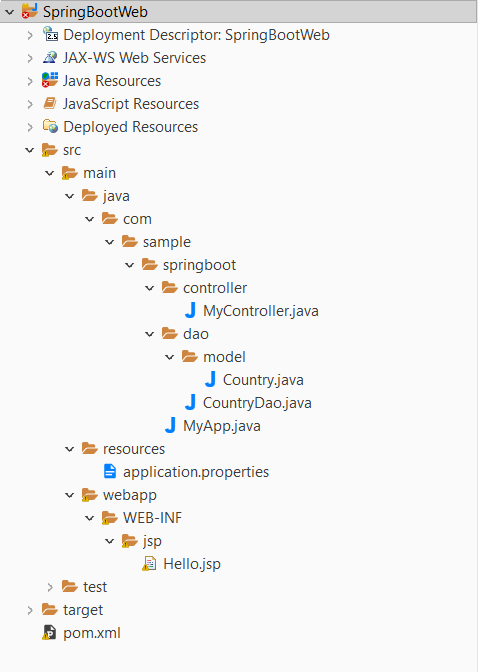
So our final project structure will be similar to bellow figure.
Now our application ready to run. Lets create war file by maven install command. Right click on project and go to Run As -> Maven Install.

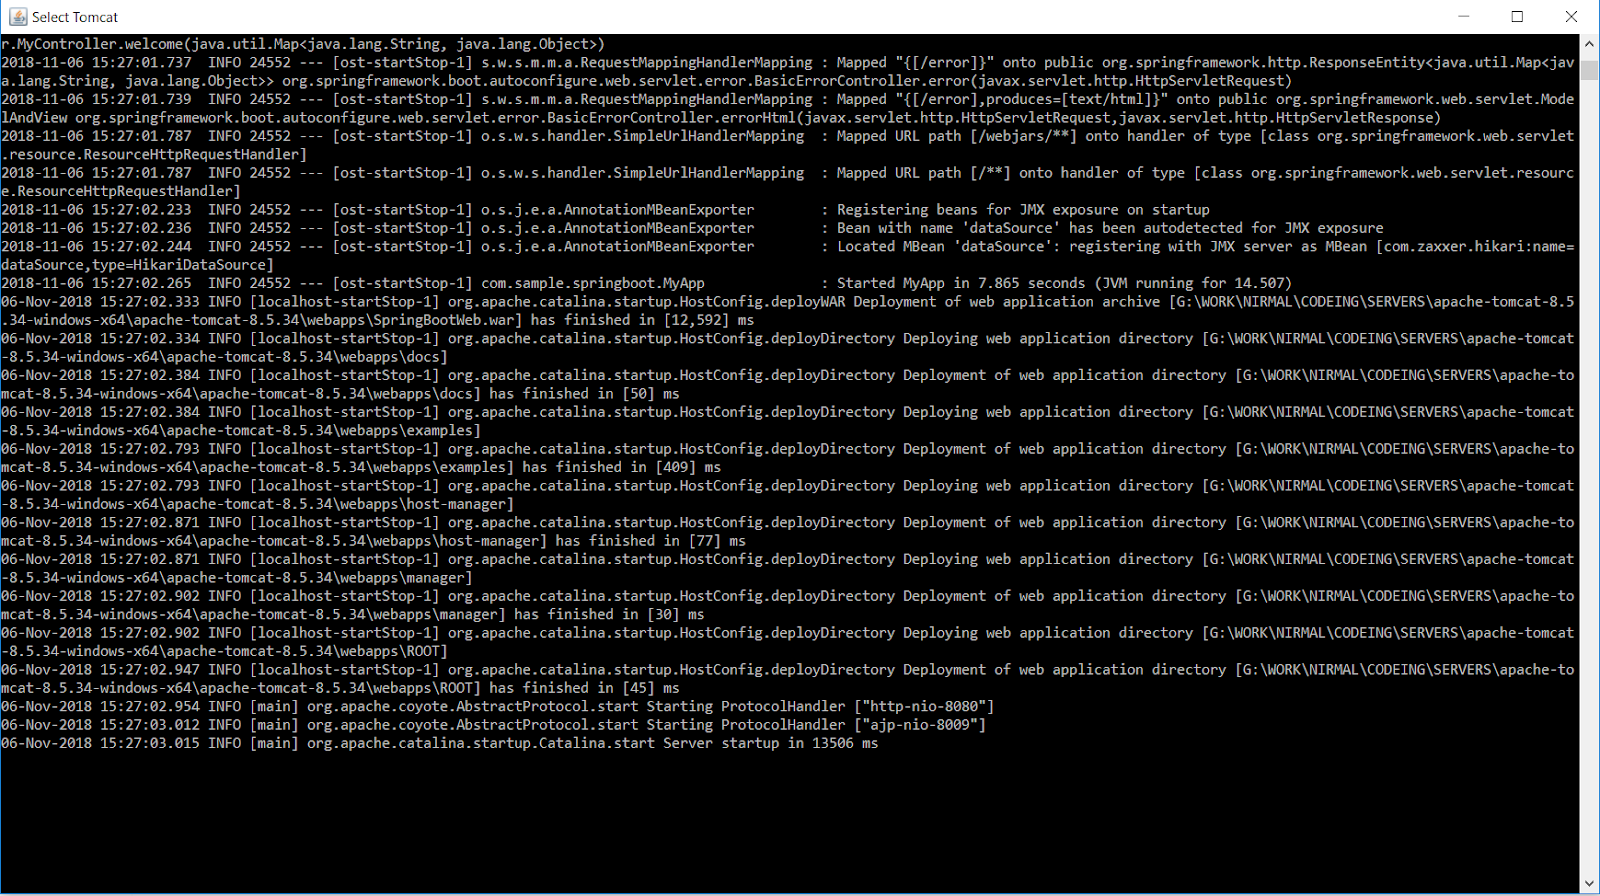
Then after successful installation you can see SpringBootWeb.war file inside the target folder. Now lets deploy this war file in to Tomcat server. (Place this war file inside the webapps folder on tocat and then start the tomcat server)

When successfully deployed the application you will be able to see similar out put on tomcat console.

Then you can access newly created web application on following URL
http://localhost:8080/SpringBootWeb/ and you should be able to see similar page as bellow figure.

No comments:
Post a Comment