Showing posts with label Maven. Show all posts

Sunday, April 12, 2020

Hibernate Date, TimeStamp and Time

In this post I'll demonstrate different between Hibernate Date, Time and TimeStamp with Microsoft SQL Server database. For this demonstration I will use code base of "Spring Boot REST API with SQLServer 2019" post. Git code base for the initialization of the project can find in GIT CODE base.

Prerequisites 
  1. You should have install java 1.8 or above.
  2. You should have Eclipse installed in your PC.
  3. Your PC should setup Maven installed and configured.
  4. MS SQL server need to be installed. 


Modify Model class 

For this demonstration I will add three parameters to out model class "Book". Those three parameters will map to respective columns in "BOOKS" table which store TIMESTAMP, DATE and TIME.

@Temporal(TemporalType.TIMESTAMP)
private Date timeStamp;
@Temporal(TemporalType.DATE)
private Date date;
@Temporal(TemporalType.TIME)
private Date time;

I have added above three parameters and relevant geter/setter methods.We can define the preferred mapping with the @Temporal annotation. As you can see in above code, it takes a TemporalType enum as a value. The enum allows you to select the SQL type (DATE, TIME or TIMESTAMP) which you want to use.

Modify Service class 

Then lets update the service method of setDateTime which set values for book objects time, date and time stamp. 

private void setDateTime(Book book){
   Date date= Calendar.getInstance().getTime();
   book.setTimeStamp(date);
   book.setDate(date);
   book.setTime(date);
}

Then call this setDateTime method from saving method of Book saveBookInJSON method. 


Run the application

In order to run first we have to perform maven install command and then we can run the application


Go to run debug configuration and add following command 

spring-boot:run


Then run the application  by click on Run button


After successful execution you should be able to see similar output as show below.


Lets Test the application 


Then lets add new Book in to API


curl -H "Accept: application/json" -H "Content-type: application/json" -X POST -d "{ \"isbmNumber\":\"9999\", \"name\":\"How to develop API\", \"description\":\"sample book\", \"auther\":\"Nirmal Balasooriya \" }" http://localhost:8080/saveOrUpdate

  
For this one following output will return


{"code":"1","desc":"Book save successful","t":"9999"}

If you check the database then you could see the saved data in the database as show in below.

Saved details in the Database.

As you can see in the database Date, Time and TimeStamp values can be see as show below.

time          :  17:45:28.6600000
date          2020-04-12
timestamp :  2020-04-12 17:45:28.6590000

You can be find updated code base in following GIT HUB location.

Monday, March 16, 2020

Deploy static resource in war file using Maven

In this post I will demonstrate how we can deploy simple static file in a war file. This will only use maven and will not use any other framework.


Prerequisites 


  1. You should have install java 1.8 or above.
  2. You should have Eclipse/IntelliJ Idea installed in your PC.
  3. Your PC should setup Maven installed and configured.


Create the Project

In InteliJIdea go to Files - > New -> Project select default JDK installed and click next as show in below figure.


Then provide Project name and GroupID to your project. I will use following details

Name      : StaticWebResource
GroupID : com.nirmal.blog

Then click Finish.


Add relevant dependencies Project

Lets add relevant dependencies in to the project. Just modify project pom file as show below.

<?xml version="1.0" encoding="UTF-8"?>
<project xmlns="http://maven.apache.org/POM/4.0.0"
         xmlns:xsi="http://www.w3.org/2001/XMLSchema-instance"
         xsi:schemaLocation="http://maven.apache.org/POM/4.0.0 http://maven.apache.org/xsd/maven-4.0.0.xsd">
    <modelVersion>4.0.0</modelVersion>

    <groupId>com.nirmal.blog</groupId>
    <artifactId>StaticWebResource</artifactId>
    <version>1.0-SNAPSHOT</version>
    <packaging>war</packaging>
    <build>
        <plugins>
            <plugin>
                <groupId>org.apache.maven.plugins</groupId>
                <artifactId>maven-war-plugin</artifactId>
                <version>2.3</version>
                <configuration>
                    <failOnMissingWebXml>false</failOnMissingWebXml>
                </configuration>
            </plugin>
            <plugin>
                <groupId>org.springframework.boot</groupId>
                <artifactId>spring-boot-maven-plugin</artifactId>
            </plugin>
        </plugins>
        <finalName>StaticWebResource</finalName>
    </build>

</project>

Make sure to add maven-war-plugin and set the configuration "failOnMissingWebXml"  value as false.


Add static resource in to Project

For the demonstration purposes I will use "jquery.min.js". First download this file in to local PC. Then create new folder call webapp. Then put your static resources in this folder. In my demonstration I will put downloaded jquery.min.js file.


Lets Create the war file

To create the war file just perform maven install (Just double click on install under lifecycle in Maven section ) and then you can see the generated war file inside target folder.


Deploy in to JBoss server

Log in to the JBoss web admin console and navigate to deployments tab. Then click on Add button and Then click Next. Select war file and again click next and Click Finish. Application will successfully deployed in to the JBoss server.

Now you should be able to access the deployed static resource from following URL.

http://localhost:8080/StaticWebResource/jquery.min.js

Loaded static resource file. 
You can find project source on following GIT resource.


Saturday, March 7, 2020

Managing resources using Jackrabbit with Spring Boot

In this post I will demonstrate how to work with Jackrabbit content repository with Spring Boot application. The Apache Jackrabbit content repository is a fully conforming implementation of the Content Repository for Java Technology API. A content repository is a hierarchical content store with support for structured and unstructured content, full text search, versioning, transactions, observation etc.


Prerequisites 
  1. You should have install java 1.8 or above.
  2. You should have Eclipse/IntelliJ Idea installed in your PC.
  3. Your PC should setup Maven installed and configured.


Lets setup Jackrabbit 

You can download the latest jackrabbit from official Jackrabbit web page . I will download the war file and deploy it on JBoss EAP.
To deploy it in to JBoss EAP you should have access the web admin console. In there  go to Deployments and click "Add" button show in figure below. Then click next and select the war file you downloaded. Then click next and then click finish.


Once you successfully installed the application you should be able to access the default jackrabit web interface from http://localhost:8080/jackrabbit-webapp-2.18.5/ you should see similar page as show below.


Create your first repository by click on "Create Content Repository". By click on this button system will create the default Jackrabbit repository with default settings.

Success Page of JackRabbit repository creation 


Now when you access Jackrabbit default URL you will be able to see as follows.


When you create this repository JBoss EAP will create new folder call "jackrabbit" on <JBOSS_HOME_DIR>/bin folder. As show in below.


Lets create project 

Open InelliJ IDEA and create new maven project. I will using following details for the project.

groupId    : com.nirmal.JackrabbitSpringBoot
artifactId : JackrabbitSpringBoot

I will add relevant dependencies in to the POM file as show below.

<?xml version="1.0" encoding="UTF-8"?>
<project xmlns="http://maven.apache.org/POM/4.0.0"
         xmlns:xsi="http://www.w3.org/2001/XMLSchema-instance"
         xsi:schemaLocation="http://maven.apache.org/POM/4.0.0 http://maven.apache.org/xsd/maven-4.0.0.xsd">
    <modelVersion>4.0.0</modelVersion>

    <groupId>com.nirmal.JackrabbitSpringBoot</groupId>
    <artifactId>JackrabbitSpringBoot</artifactId>
    <version>1.0-SNAPSHOT</version>
    <parent>
        <groupId>org.springframework.boot</groupId>
        <artifactId>spring-boot-starter-parent</artifactId>
        <version>1.5.1.RELEASE</version>
        <relativePath />
    </parent>

    <properties>
        <project.build.sourceEncoding>UTF-8</project.build.sourceEncoding>
        <project.reporting.outputEncoding>UTF-8</project.reporting.outputEncoding>
        <java.version>1.8</java.version>
    </properties>

    <dependencies>
        <dependency>
            <groupId>javax.servlet</groupId>
            <artifactId>jstl</artifactId>
        </dependency>
        <dependency>
            <groupId>org.springframework.boot</groupId>
            <artifactId>spring-boot-starter-web</artifactId>
        </dependency>
        <dependency>
            <groupId>org.springframework.boot</groupId>
            <artifactId>spring-boot-starter-test</artifactId>
            <scope>test</scope>
        </dependency>
        <!-- Provided -->
        <dependency>
            <groupId>org.apache.tomcat.embed</groupId>
            <artifactId>tomcat-embed-jasper</artifactId>
            <scope>provided</scope>
        </dependency>
        <dependency>
            <groupId>org.springframework.boot</groupId>
            <artifactId>spring-boot-starter-data-jpa</artifactId>
        </dependency>
        <dependency>
            <groupId>com.microsoft.sqlserver</groupId>
            <artifactId>mssql-jdbc</artifactId>
            <version>6.1.0.jre8</version>
        </dependency>

        <!-- The JCR API -->
        <dependency>
            <groupId>javax.jcr</groupId>
            <artifactId>jcr</artifactId>
            <version>2.0</version>
        </dependency>

        <!-- Jackrabbit content repository -->
        <dependency>
            <groupId>org.apache.jackrabbit</groupId>
            <artifactId>jackrabbit-core</artifactId>
            <version>2.18.1</version>
        </dependency>
        <dependency>
            <groupId>org.apache.jackrabbit</groupId>
            <artifactId>jackrabbit-jcr2dav</artifactId>
            <version>2.19.3</version>
        </dependency>
        <dependency>
            <groupId>org.apache.jackrabbit</groupId>
            <artifactId>jackrabbit-jcr-commons</artifactId>
            <version>2.19.3</version>
        </dependency>

    </dependencies>
    <build>
        <plugins>
            <plugin>
                <groupId>org.springframework.boot</groupId>
                <artifactId>spring-boot-maven-plugin</artifactId>
            </plugin>
        </plugins>
    </build>
</project>


Then I will add application.properties file in resources folder with following content. note that I will use default jackrabit user name and password in this demonstration. Jackrabit url can be get as following format http://<ip address>:<port>/<contextpathOfJackrabitserver>/server

#==== connect to mssql ======#
spring.jpa.hibernate.ddl-auto=update
spring.datasource.url=jdbc:sqlserver://localhost;databaseName=TestDB
spring.datasource.username=nirmal
spring.datasource.password=Test123_
spring.datasource.driverClassName=com.microsoft.sqlserver.jdbc.SQLServerDriver
spring.jpa.database-platform=org.hibernate.dialect.SQLServer2012Dialect
server.port = 9090

spring.jpa.properties.hibernate.show_sql=true
spring.jpa.properties.hibernate.use_sql_comments=false
spring.jpa.properties.hibernate.format_sql=true

#jackrabbit configs
jackrabbit.username=admin
jackrabbit.userpassword=admin
jackrabbit.url=http://localhost:8080/jackrabbit-webapp-2.18.5/server


Then I will add spring boot startup class as  AppInitializer class with following content in "com.nirmal.JackrabbitSpringBoot.app" package.

package com.nirmal.JackrabbitSpringBoot.app;
    import javax.sql.DataSource;
    import org.springframework.beans.factory.annotation.Autowired;
    import org.springframework.boot.SpringApplication;
    import org.springframework.boot.autoconfigure.SpringBootApplication;
    import org.springframework.boot.builder.SpringApplicationBuilder;
    import org.springframework.boot.web.support.SpringBootServletInitializer;
    import org.springframework.context.annotation.ComponentScan;

/**
 * Spring Boot initialization class of the JackrabbitSpringBoot project
 *
 * @author Nirmal Balasooriya
 *
 */

//@EnableJpaRepositories("com.nirmal.springbootrest")
@SpringBootApplication(scanBasePackages = { "com.nirmal.JackrabbitSpringBoot.app" })
@ComponentScan({"com.nirmal.JackrabbitSpringBoot.app"})
public class AppInitializer extends SpringBootServletInitializer {

    @Autowired
    DataSource dataSource;

    @Override
    protected SpringApplicationBuilder configure(SpringApplicationBuilder application) {
        return application.sources(AppInitializer.class);
    }

    public static void main(String[] args) {
        SpringApplication.run(AppInitializer.class, args);
    }
}


Next Lets add the Controller. In my controller it will have two API methods call "getImage" and "uploadResource". Both will take both will take path variable call "resourceName". (This is image name without extension). Full controller will be as below.


package com.nirmal.JackrabbitSpringBoot.app;

import org.apache.tika.io.IOUtils;
import org.slf4j.Logger;
import org.slf4j.LoggerFactory;
import org.springframework.core.io.ClassPathResource;
import org.springframework.core.io.Resource;
import org.springframework.http.MediaType;
import org.springframework.stereotype.Component;
import org.springframework.stereotype.Controller;
import org.springframework.web.bind.annotation.GetMapping;
import org.springframework.web.bind.annotation.PathVariable;
import org.springframework.web.bind.annotation.ResponseBody;
import org.springframework.beans.factory.annotation.Value;

import javax.jcr.*;

import org.apache.jackrabbit.commons.JcrUtils;
import java.io.InputStream;

@Controller
@Component
public class MainController {

    Logger logger = LoggerFactory.getLogger(MainController.class);

    @Value("${jackrabbit.username}")
    private String username;

    @Value("${jackrabbit.userpassword}")
    private String userPassword;

    @Value("${jackrabbit.url}")
    private String jackrabbitUrl;

    @GetMapping("/uploadResource/{resourceName}")
    @ResponseBody
    public Response uploadResource(@PathVariable("resourceName")String resourceName) throws Exception {
        logger.info("Upload resource resourceName : " + resourceName);
        JackRabitResource jackRabitResource=new JackRabitResource();
        resourceName=resourceName+".jpg";
        Response<JackRabitResource> response = new Response<JackRabitResource>("0", "Resource does not exist", null);
        if (new ClassPathResource(resourceName).exists()){
            uploadFile(resourceName);
            response = new Response<JackRabitResource>("1", "Resource Added Successfully", jackRabitResource);
        }
        return response;
    }

    @GetMapping(
            value = "/getImage/{resourceName}",
            produces = MediaType.IMAGE_JPEG_VALUE
    )
    public @ResponseBody byte[] getImage(@PathVariable("resourceName")String resourceName) throws Exception {
        logger.info("Get Image resourceName : " + resourceName);
        resourceName=resourceName+".jpg";
        if (new ClassPathResource(resourceName).exists()){
            try {
                return getContent(resourceName);
            }catch (PathNotFoundException e){
                return null;
            }

        }
        return null;
    }

    public void uploadFile(String name) throws Exception{
        Repository repository = JcrUtils.getRepository(jackrabbitUrl);
        Session session = repository.login(
                new SimpleCredentials(username, userPassword.toCharArray()));
        try{
            Resource resource = new ClassPathResource(name);
            InputStream stream = resource.getInputStream();
            Node folder = session.getRootNode();
            Node file = folder.addNode(name,"nt:file");
            Node content = file.addNode("jcr:content","nt:resource");
            Binary binary = session.getValueFactory().createBinary(stream);
            content.setProperty("jcr:data",binary);
            content.setProperty("jcr:mimeType","image/gif");
            session.save();
        }finally{
            session.logout();
        }
    }

    public byte[] getContent(String name) throws Exception{

        Repository repository = JcrUtils.getRepository(jackrabbitUrl);
        Session session = repository.login(
                new SimpleCredentials(username, userPassword.toCharArray()));
        Node folder = session.getRootNode();
        Node file=folder.getNode(name);
        Node content=file.getNode("jcr:content");
        String path = content.getPath();
        Binary bin = session.getNode(path).getProperty("jcr:data").getBinary();
        InputStream stream = bin.getStream();
        return IOUtils.toByteArray(stream);
    }
}


For testing purposes I will put two jpg images in resource folder so after all there you could see similar project structure as below figure.

Final project structure 


Lets run the applciation

You can perform maven install command on the project and then you can run the application by following command in target folder. Make sure that JBoss EAP which we deployed jackrabbit server running while you are testing.

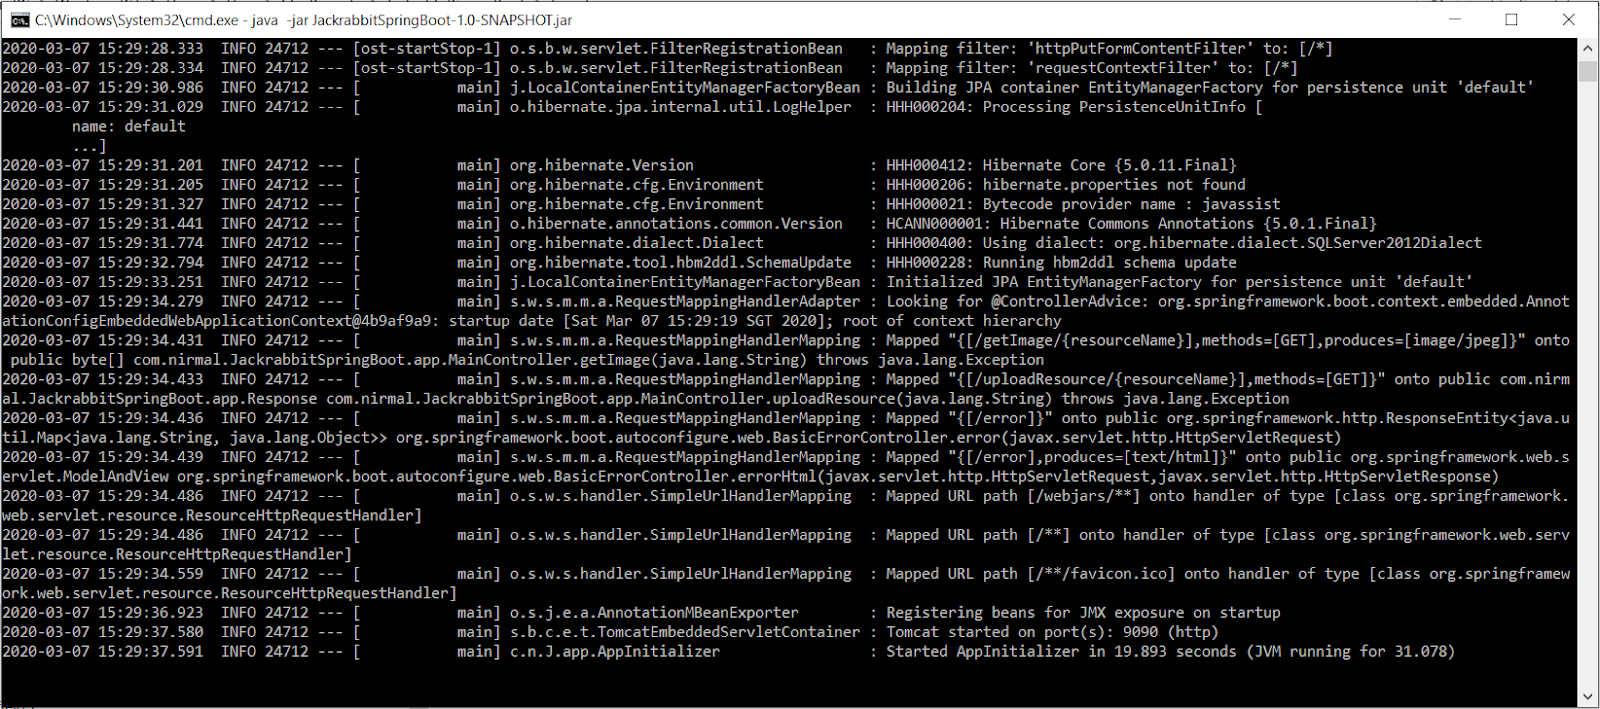
java -jar JackrabbitSpringBoot-1.0-SNAPSHOT.jar

Once application successfully started you could see similar console output as show below.


Also you should be able to access following URL from browser http://localhost:9090/getImage/srilanka and should get following output on web browser.


Then lets try to upload two images in to jackrabbit repository which I added in side the resource folder. You can brows following URL and should able to get respective outputs as well.


Since both resources "srilanka.jpg" and "colombo.jpg" available in resources folder both occasions it will return following output.

{"code":"1","desc":"Resource Added Successfully","t":null}

In case if you try to access not available resource as below.


{"code":"0","desc":"Resource does not exist","t":null}

So now we can access our jackrabit repository from following URL and see whether resources are uploaded.
http://localhost:8080/jackrabbit-webapp-2.18.5/repository/default/

You should be able to see as following 


Then lets try to access resources in Jackrabbit repository. for respective URLs should return similar output as show below.

http://localhost:9090/getImage/srilanka
Retrieving image from repository


http://localhost:9090/getImage/colombo
Retrieving image from repository

You can find the code base related to this project from following FITHUB location. 

Friday, February 28, 2020

Spring Boot property encryption using Jasypt

In this post I will demonstrate how to encrypt data on Spring Boot property file using Jasypt (Java Simplified Encryption). For this I will use code base of my previous post "Spring Boot REST API CRUD operations with MySQL with Spring Data" you can download the code base on github.

Prerequisites 
  1. You should have install java 1.8 or above.
  2. You should have Eclipse installed in your PC.
  3. Your PC should setup Maven installed and configured.
  4. MYSQL server need to be installed. 

Install Jasypt (Java Simplified Encryption) 

In this example we have to use Jasypt to encript our passwords. So first we can download the Jasypt from official web site on http://www.jasypt.org/download.html

Extract in to folder and navigate to bin folder and you can run encrypt.bat/encrypt.sh with relevant parameters. 

encrypt.bat input="This is my message to be encrypted" password=MYPASSWORD_SECRET 

input
This is the password that we going to use in the application

password
This is the secret to decrypt the password

Then you can see similar output as figure below.

Sample encrypt command 
Make sure to use user password for input parameter and generate the encrypted string


Dependency Configure

I will use following project https://github.com/NirmalBalasooriya/RestApiSpringBoot for the demonstration of this post. Check out the project in to you IDE.  First lets add Jasypt  dependency in to pom.

<dependency>
<groupId>com.github.ulisesbocchio</groupId>
<artifactId>jasypt-spring-boot</artifactId>
<version>3.0.2</version>

</dependency>


Update the project pom file as show below 


<project xmlns="http://maven.apache.org/POM/4.0.0" xmlns:xsi="http://www.w3.org/2001/XMLSchema-instance" xsi:schemaLocation="http://maven.apache.org/POM/4.0.0 http://maven.apache.org/xsd/maven-4.0.0.xsd">
  <modelVersion>4.0.0</modelVersion>
  <groupId>com.nirmal.springbootrest</groupId>
  <artifactId>RestApiSpringBoot</artifactId>
  <version>0.0.1-SNAPSHOT</version>

<parent>
        <groupId>org.springframework.boot</groupId>
        <artifactId>spring-boot-starter-parent</artifactId>
        <version>2.0.5.RELEASE</version>
    </parent>
<dependencies>
<!-- Compile -->
<dependency>
<groupId>org.springframework.boot</groupId>
<artifactId>spring-boot-starter-web</artifactId>
</dependency>

        <dependency>
            <groupId>org.springframework.boot</groupId>
            <artifactId>spring-boot-starter-data-jpa</artifactId>
        </dependency>
<dependency>
<groupId>javax.servlet</groupId>
<artifactId>jstl</artifactId>
</dependency>
<!-- Provided -->
<dependency>
<groupId>org.apache.tomcat.embed</groupId>
<artifactId>tomcat-embed-jasper</artifactId>
<scope>provided</scope>
</dependency>
<!-- Runtime -->
<dependency>
<groupId>com.microsoft.sqlserver</groupId>
<artifactId>mssql-jdbc</artifactId>
<version>6.1.0.jre8</version>
</dependency>

<dependency>
<groupId>com.github.ulisesbocchio</groupId>
<artifactId>jasypt-spring-boot</artifactId>
<version>3.0.2</version>
</dependency>

</dependencies>
<build>
<plugins>
<plugin>
<groupId>org.springframework.boot</groupId>
<artifactId>spring-boot-maven-plugin</artifactId>
</plugin>
</plugins>
</build>

</project>


Application Configuration

First we have to add following configurations in to Spring boot configurations. For this we have two options either we can add the configuration detail in to default application.property file or we can add separate property file to hold jasypt configurations. I will add these configurations in to existing property file.

jasypt.encryptor.iv-generator-classname=org.jasypt.iv.NoIvGenerator
jasypt.encryptor.algorithm=PBEWithMD5AndDES

Then we can change the spring.datasource.password field. we can use encrypted script there. Make sure to us following format

ENC(generated encrypted string)

EG:
ENC(Qh5TpYelwS//T13si7t218U6t42iM4B2)

So our final application property file would be something similar to this.

#==== connect to mysql ======#
spring.jpa.hibernate.ddl-auto=update
spring.datasource.url=jdbc:sqlserver://localhost;databaseName=TestDB
spring.datasource.username=nirmal
spring.datasource.password=ENC(Qh5TpYelwS//T13si7t218U6t42iM4B2)
spring.datasource.driverClassName=com.microsoft.sqlserver.jdbc.SQLServerDriver
spring.jpa.database-platform=org.hibernate.dialect.SQLServer2012Dialect

spring.jpa.properties.hibernate.show_sql=true
spring.jpa.properties.hibernate.use_sql_comments=false
spring.jpa.properties.hibernate.format_sql=true

#==== Logging configurations ======#
logging.level.root=WARN,INFO,ERROR
logging.level.com.baeldung=TRACE

jasypt.encryptor.iv-generator-classname=org.jasypt.iv.NoIvGenerator
jasypt.encryptor.algorithm=PBEWithMD5AndDES

#jasypt.encryptor.password=MYPASSWORD_SECRET


Enable Application Configuration

Lets enable the encrypted configuration by adding following annotation in our spring boot initialization class  we have to use @EnableEncryptableProperties configuration annotaion. So final class would be something similar below.


package com.nirmal.springbootrest;

import javax.sql.DataSource;

import com.ulisesbocchio.jasyptspringboot.annotation.EnableEncryptableProperties;
import org.springframework.beans.factory.annotation.Autowired;
import org.springframework.beans.factory.annotation.Value;
import org.springframework.boot.SpringApplication;
import org.springframework.boot.autoconfigure.EnableAutoConfiguration;
import org.springframework.boot.autoconfigure.SpringBootApplication;
import org.springframework.boot.builder.SpringApplicationBuilder;
import org.springframework.boot.web.servlet.support.SpringBootServletInitializer;
import org.springframework.context.annotation.ComponentScan;
import org.springframework.context.annotation.Configuration;
import org.springframework.context.annotation.PropertySource;
import org.springframework.data.jpa.repository.config.EnableJpaRepositories;

/**
 * Spring Boot initialization class of the ResrApiSpringBoot project
 * 
 * @author Nirmal Balasooriya
 *
 */

@ComponentScan({ "com.nirmal.springbootrest", "com.nirmal.springbootres.controller" })
@EnableJpaRepositories("com.nirmal.springbootrest")
@SpringBootApplication(scanBasePackages = { "com.nirmal.springbootres.controller" })
@EnableEncryptableProperties
//@PropertySource(name="EncryptedProperties", value = "classpath:encrypted.properties")
public class AppInitializer extends SpringBootServletInitializer {

@Autowired
DataSource dataSource;

@Override
protected SpringApplicationBuilder configure(SpringApplicationBuilder application) {
return application.sources(AppInitializer.class);
}

public static void main(String[] args) {
SpringApplication.run(AppInitializer.class, args);
}

}


Note-
If you need to use separate property file for encrypted properties you can use following

@PropertySource(name="EncryptedProperties", value = "classpath:encrypted.properties")


Run the application


In order to run first we have to perform maven install command and then we can run the application

in command line we can use following command to run the application

mvn -Djasypt.encryptor.password=MYPASSWORD_SECRET spring-boot:run

Here we are passing the secret which we used in password encryption process. it is possible to configure the secrent in property file as well. For that you can use following property.(Which I commented on my example since I'm passing it as command line argument)

jasypt.encryptor.password=MYPASSWORD_SECRET

One successfully started the application you should be able to see similar result as below. 


Also you should be see table has been created on your configured Database and you can access the web service from following URL. 

With following out put on web browser.


Lets Test the application 


Then lets add new Book in to API


curl -H "Accept: application/json" -H "Content-type: application/json" -X POST -d "{ \"isbmNumber\":\"9999\", \"name\":\"How to develop API\", \"description\":\"sample book\", \"auther\":\"Nirmal Balasooriya \" }" http://localhost:8080/saveOrUpdate

  
For this one following output will return


{"code":"1","desc":"Book save successful","t":"9999"}


If you check the database you can see data has been inserted to the Database.


Also we can access data through API as well http://localhost:8080/findBook/9999


You can access the updated code base from following GitHub URL.